It’s important to make sure your spreadsheets are free of spelling errors. They not only look unprofessional, but they can also make the data confusing for users.
On Google Docs, spell checking is always on, it automatically highlights misspelled words and even corrects wrong grammar. Unfortunately, it’s a different story on Google Sheets. We need to manually run the spell checker.
In this post, I’ll go over how to check spelling in Google Sheets using the options menu and keyboard shortcuts. Plus, we’ll explore some of the deeper spell-checking options that are available in Google Sheets along with some native spell-check alternatives like Grammarly.
How To Do Spell Check In Google Sheets
Let’s first take a look at how to check spelling in Google Sheets using the options menu.
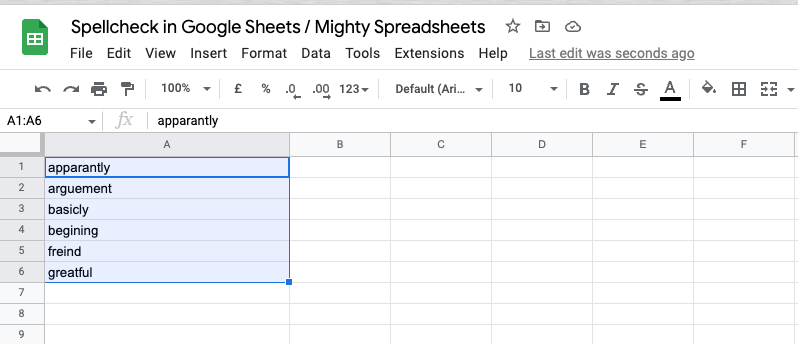
Step 1: First, you need to select the range of cells you want to run the checker on, otherwise, the spell checker won’t work.
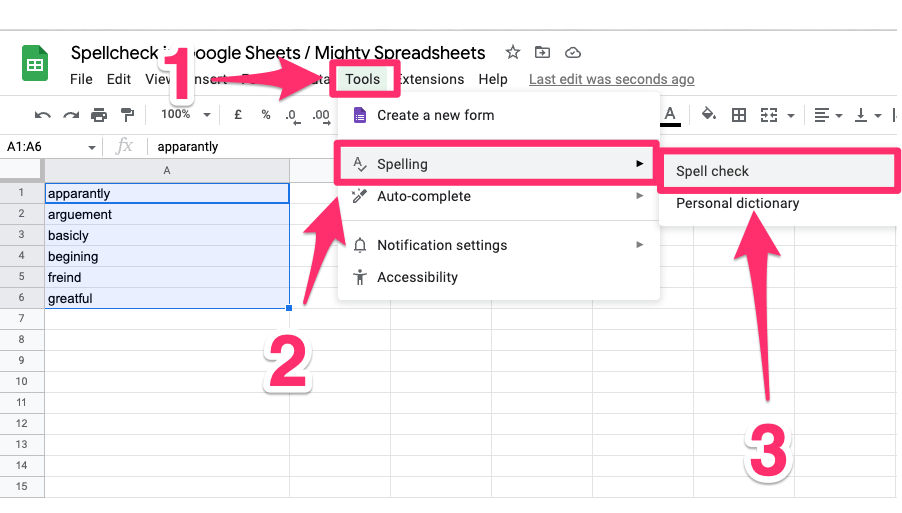
Step 2: Next Click Tools on the options menu.
Step 3: Hover your cursor over to Spelling. You’ll see two options.
Step 4: Select Spell check.
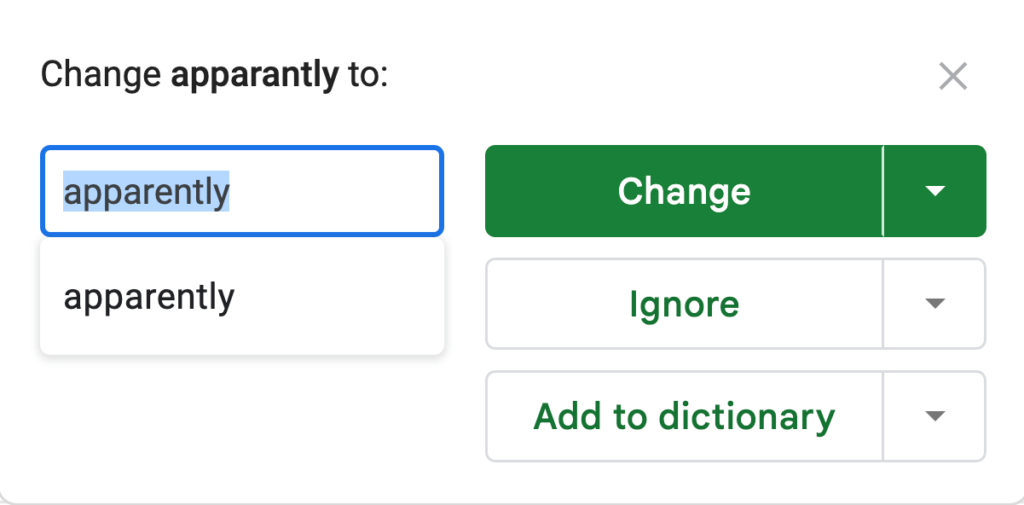
Step 5: Unlike Google docs, it won’t underline the errors. Instead, it will open up a dialog box and show you the suggested spellings if there’s anything wrong.
It’s important to remember that if you have set the locale British in Sheets, it won’t find spelling mistakes in American English.
How To Do Spell Check In Google Sheets With A Keyboard Shortcut
The fastest way to run a spell check is by using keyboard shortcuts. But before we start smashing keys, we need to enable compatible spreadsheet shortcuts.
You don’t need to do it again and again, it’s just one time – set and forget. Here’s how you do it:
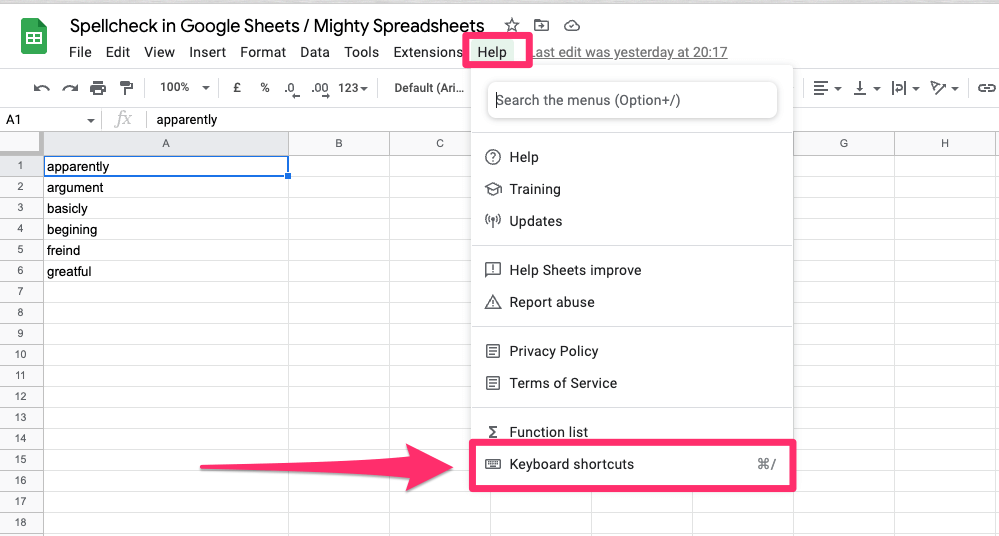
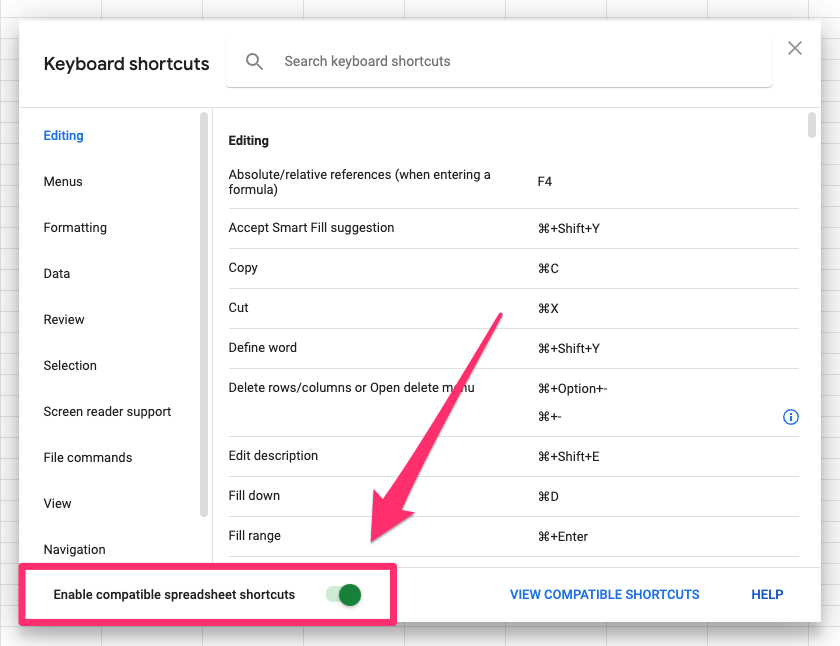
Step 1: Click Help on the options menu.
Step 2: Click Keyboard shortcuts which is the last option in the menu.
Step 3: This will open up the Keyboard shortcut dialog box. On the bottom of the box, you’ll see the enable compatible spreadsheet shortcuts option.
Step 4: Turn it on.
Afterward, all you need to do is select the cells you want to run the spell checker on and press F7.
Note for Mac users: By default F7 on Mac restarts a music track or jumps to the previous track so if you’d like to use spell-check feature on Mac you need to adjust your settings. To do so just go to System Preferences > Keyboard and tick the “Use F1, F2, etc. keys as standard function keys” checkbox.

Deeper Dive Into Spell Check Options
Now that you know how to run the spell checker in Google Sheets, let’s take a deeper look into some of the options of the spell check dialog box.
Change
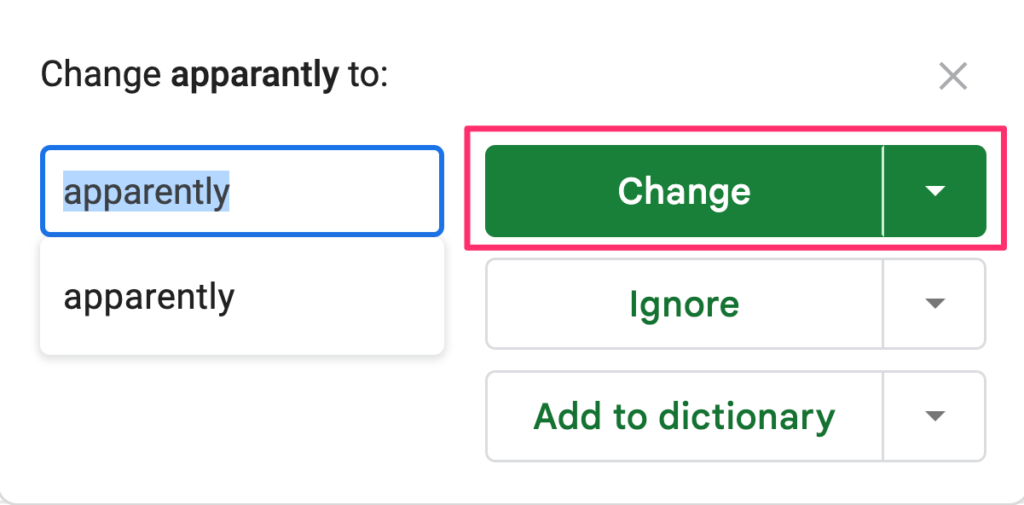
If the checker finds a misspelled word, you can use the “Change” option to quickly fix the misspelled word with the suggested correction(s).
Simply click on the misspelled word, choose the correct spelling from the dropdown menu, and then click on the “Change” button.
You can also choose the ‘Change all’ option to change all the instances of this word.
Ignore
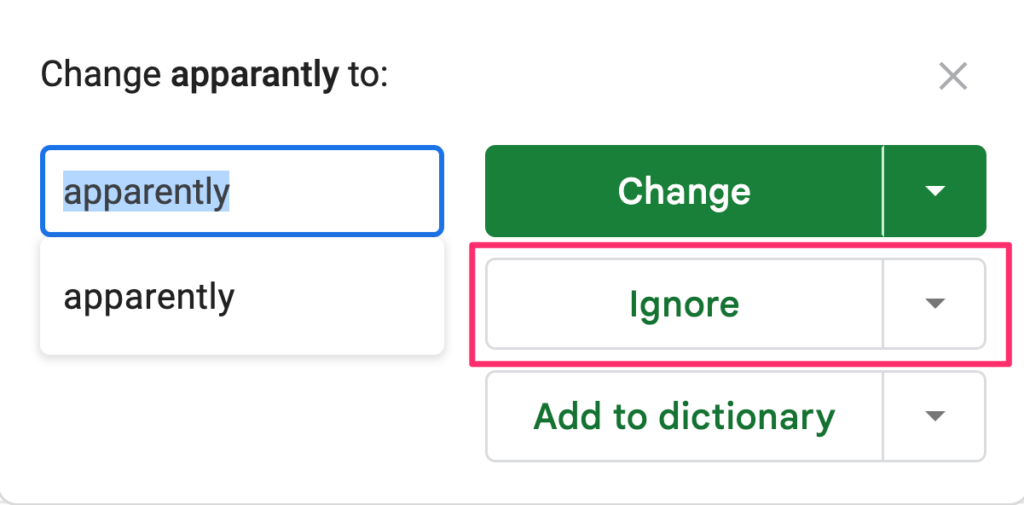
Sometimes, you might come across a word that Google Sheets considers a spelling error, but you actually want to keep it as is. In this case, you can use the “Ignore” option to tell Google Sheets to ignore it.
And just like ‘Change All’, ‘Ignore all’ ignore all the instances of this word.
This can be useful if you’re using a technical term that isn’t recognized by the spell checker.
Note: If you clicked it by accident, the only way to undo it is to clear the cache of Google Docs on your browser.
Add To Dictionary
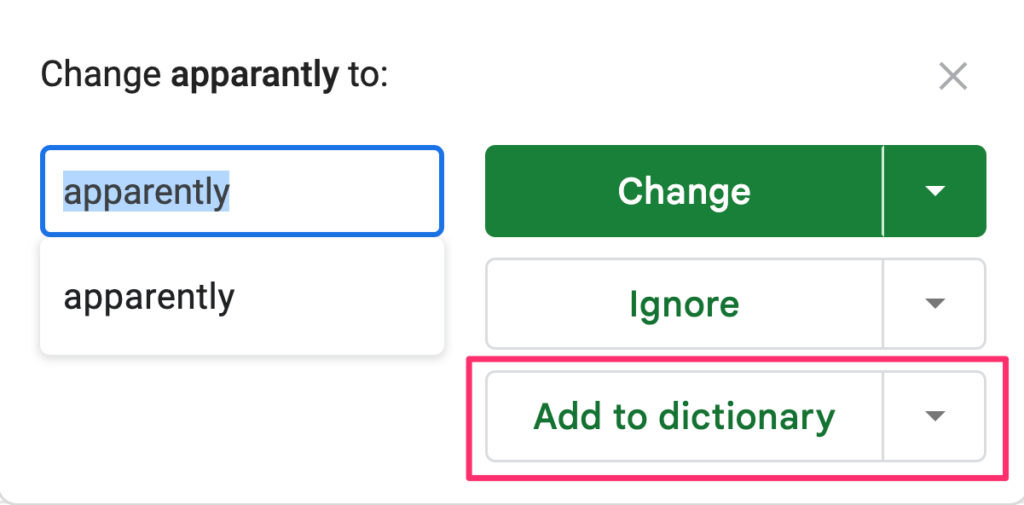
If you have a word that Google Sheets doesn’t recognize as a valid spelling, but you still want to use it now and in the future, you can add it to your personal dictionary instead of ignoring it by clicking on the “Add to dictionary” button.
This way, Google Sheets won’t flag it as an error in the future. I usually do this for company names.
Native Spell Check Alternatives
While the spell checker built into Google Sheets is fairly robust, there are a few alternatives that you may want to consider.
Two of the most popular Google Sheets spell-check alternatives are Scribens and Grammarly. Let’s take a quick look at them.
1. Scribens Spell Checker And Grammar For Google Sheets
Scribens is a FREE third-party spell checker that can be added to Google Sheets (or Docs). It is pretty much the best alternative to the native spell checker.
It offers a variety of features, including grammar and punctuation checking, synonym suggestions, and a lot more.
How to install Scribens
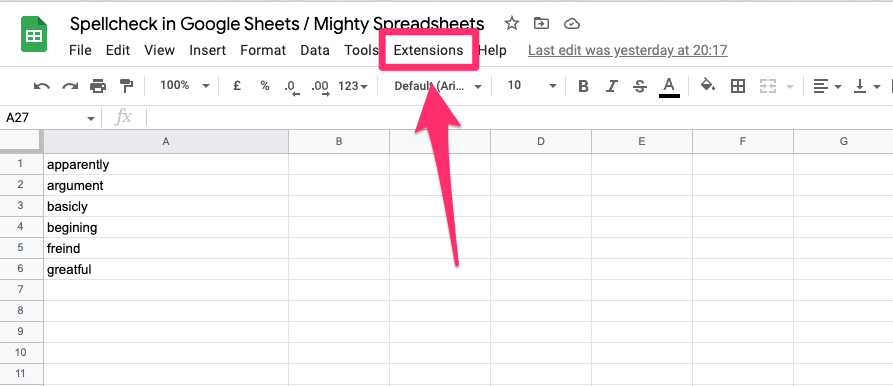
Step 1: Open Google Sheets and click on the Extensions tab from the options menu.
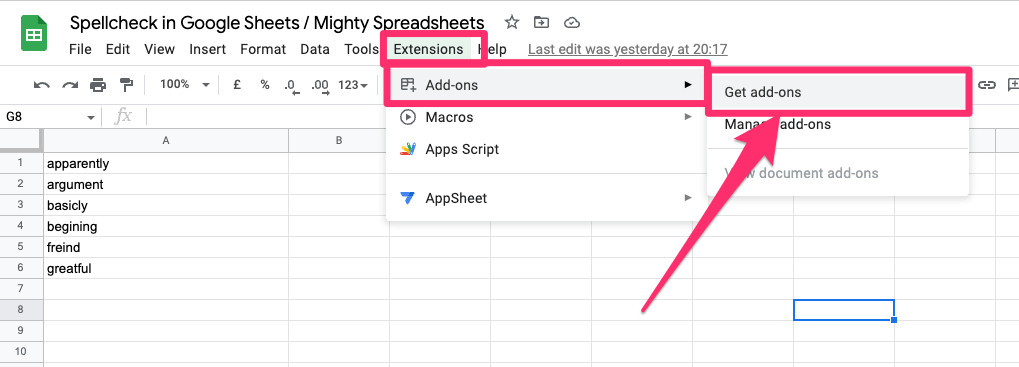
Step 2: Hover over to Add-ons and click on “Get add-ons”.
Step 3: In the search bar, type “Scribens” and press enter.
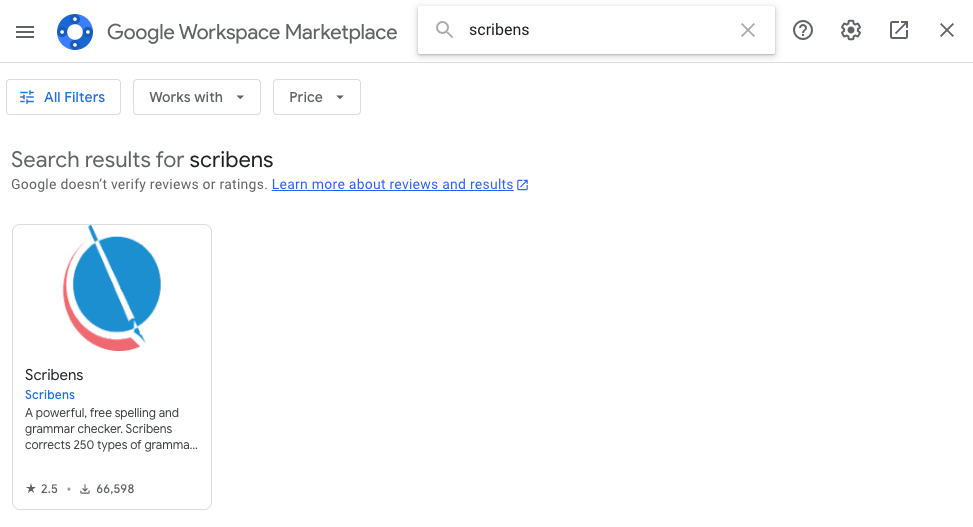
Step 4: The search results will be shown, Click on Scribens.
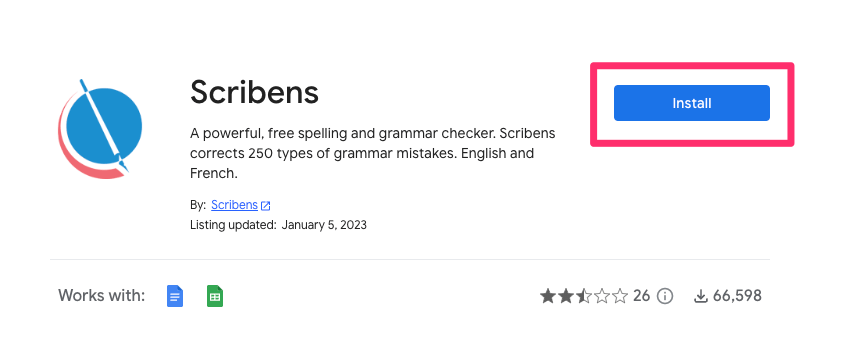
Step 5: Afterwards click on the “Install” button.
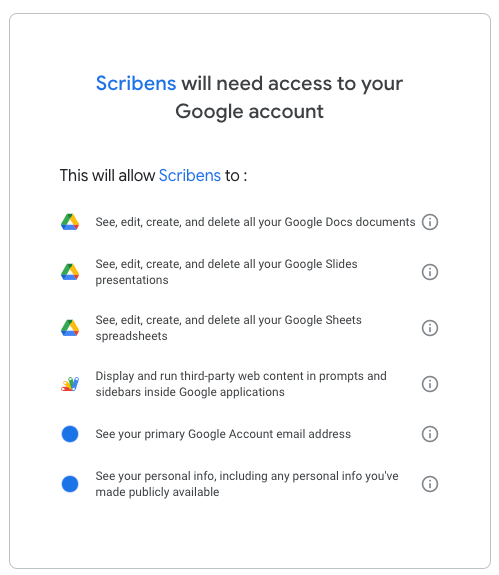
Step 6: Click “Accept” to grant the add-on access.
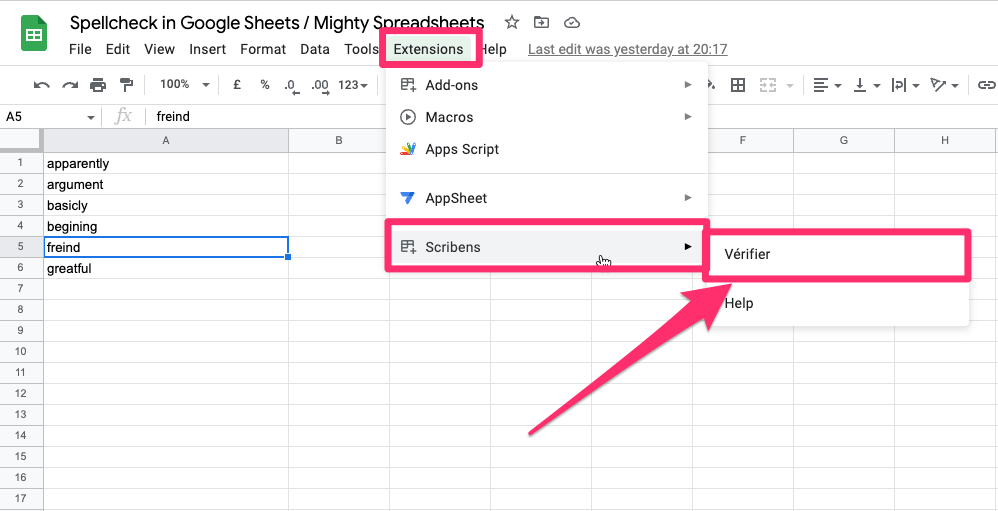
Step 7: To use the add-on simply click on Extensions > Scribens > Verify
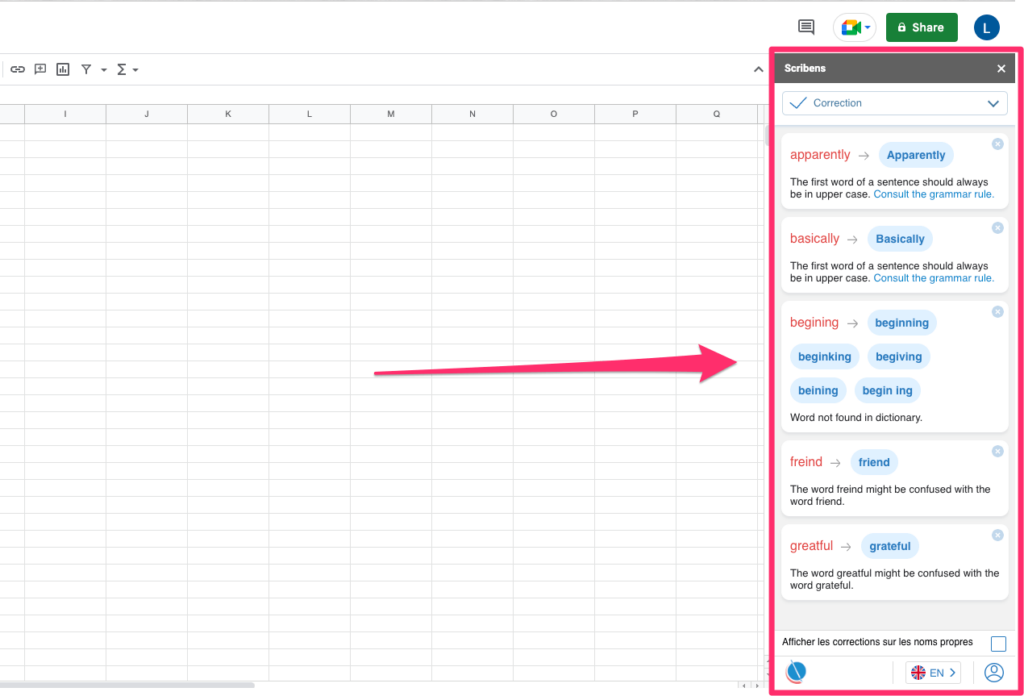
Step 8: After that, you will notice a pane on the right-hand side of your screen with available suggestions. Click on the one you like to apply the
2. Grammarly For Google Sheets
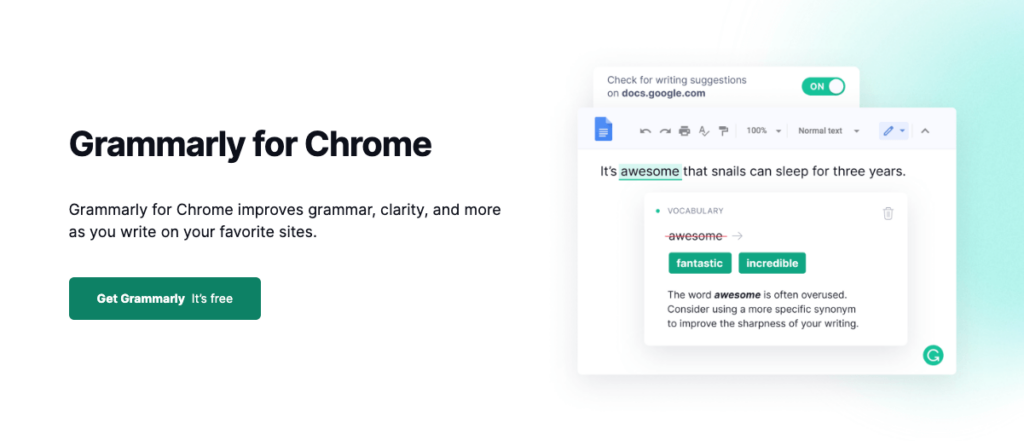
Another great alternative to the native spell checker is Grammarly, the world’s leading AI-powered writing assistant used by millions of people.
Not only does Grammarly catch spelling errors, but it also helps improve grammar, punctuation, and sentence structure. Plus, it can detect plagiarism!
Grammarly offers 2 subscriptions, the free version which finds spelling errors and basic grammar errors while the Premium version helps improve sentence structure and checks for plagiarism.
Installing Grammarly is different from Scribens and you need to sign up on their site and download their extension which should be added to Google Chrome. It automatically integrates with Google sheets once we load up a sheet.
My Final Thoughts
Although Google Spreadsheets’ spellcheck feature is not as popular as it is in Google Docs, there are still options available if you need them.
In my experience, the native/built-in spell check will likely be more than enough for most cases.
If you’re looking for more, then Scribes and Grammarly are great options that can help elevate your writing beyond what Google Sheets has to offer.