The IF formula is like a secret weapon in the world of spreadsheets. It’s super handy and lets you make choices based on specific conditions.
With IF-THEN, you can do more than just basic math – it’s like leveling up your spreadsheet skills and making data management a breeze.
Curious about using the IF formula in Google Sheets? If you’ve got a bit of experience with formulas, just type =IF(logical_test, value_if_true, value_if_false) into a cell.
Stick around, and I’ll show you how to make the most of this awesome formula!
Google Sheets IF Formula Syntax
The IF formula in Google Sheets allows you to perform a conditional calculation based on a given condition or set of conditions. The basic syntax of the IF formula is as follows:
=IF(condition, value_if_true, value_if_false)
In this syntax:
- “condition” is the test you want to run, like comparing two values or searching for a certain one.
- “value_if_true” is what you get if the condition is true.
- “value_if_false” is what you get if the condition is false.
Let me give you an example:
=IF(A1>10, "Yes", "No")
Here, the formula checks if the value in cell A1 is more than 10. If it is, you’ll see “Yes.” If not, you’ll get “No.”
Remember, you can stack IF formulas for more complex tests. Plus, you can mix in other functions with IF to do even cooler calculations!
How to Use IF (THEN/ELSE) Formula in Google Sheets
The IF-Then formula is like a handy helper, giving you the exact value you need from two or more options. Let me show you how it works.
Picture this:
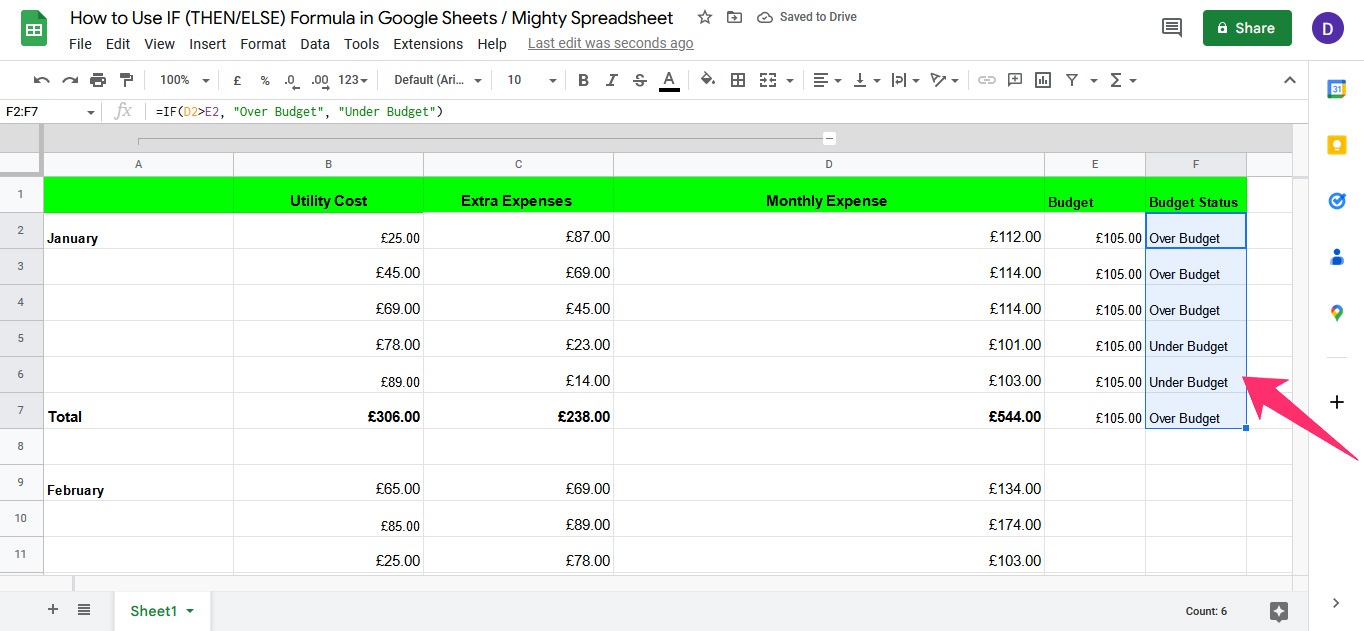
In my spreadsheet, I used the formula to show “Over Budget” or “Under Budget.” My target budget is £105. If the value is over £105, it says “Over Budget.” If it’s less, it says “Under Budget.”
Here’s how to do it:
Step 1: Open your spreadsheet and click the cell where you want the formula.

Step 2: Hit Enter, and voila! The formula gives you a result based on the info you gave it.
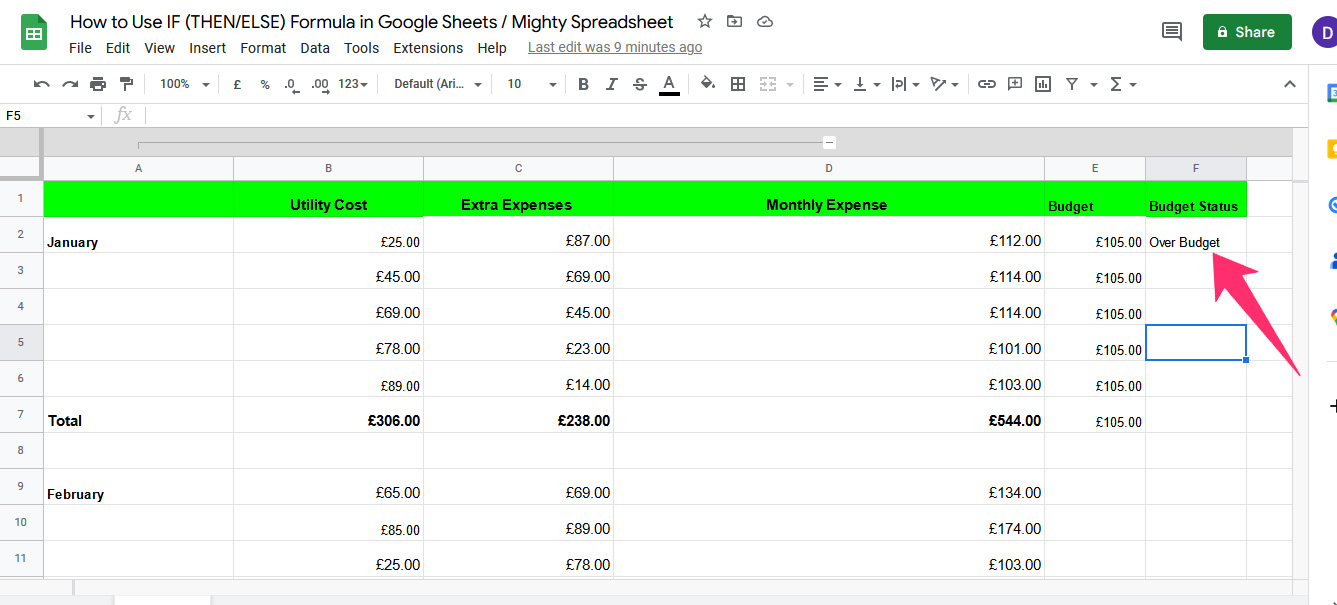
Step 3: In my case, 112 is more than 105, so it showed “Over Budget.” Just use the formula for all your cells, and you’re good to go!
How To Use IF Formula with Multiple IF Statements (Conditions)
Want to use the IF formula with multiple conditions? No problem! You’ve got two ways to do it:
- Nested IF Statement in Google Sheets
- IFS formula in Google Sheets
Let’s dive into each method:
Method 1: Nested IF Statement in Google Sheets
Nested IFs let you stack multiple IF functions together. Here’s a step-by-step guide for Google Sheets:
- Open Google Sheets and click the cell for your formula.
- Type “=” to start.
- Type “IF(” to begin the IF formula.
- Add your first logical test or condition in parentheses, like “=IF(A1>10,” to check if A1 is more than 10.
- Use a comma “,” to separate the first test from the true result.
- Type the true result, like “Yes” if A1 is more than 10.
- Add another comma for the false result.
- Put in another IF statement, its condition, and the true result. For example, “=IF(A1>5, “Maybe,” “No”)” checks if A1 is more than 5, returning “Maybe” or “No.”
- Keep adding IF statements as needed, using commas and parentheses.
- Finish with a closing parenthesis “)” and press Enter to see your result!
Here’s an example of a complete nested IF formula:
=IF(A1>10,"Yes",IF(A1>5,"Maybe","No"))
This formula gives you “Yes” if A1 is more than 10, “Maybe” if it’s between 6 and 10, and “No” if it’s 5 or less.
Feel free to nest IF formulas for more complex tests, but watch out for super long or confusing formulas. Keep it manageable, and you’re all set!
Method 2: IFS Formula in Google Sheets
The IFS formula in Google Sheets is similar to the IF formula but allows you to evaluate multiple conditions at once.
This can be more efficient than nesting multiple IF formulas, especially if you have many conditions to evaluate. To use the IFS formula in Google Sheets, follow these steps:
Step 1: Open a spreadsheet and select a cell where you want to enter the formula.
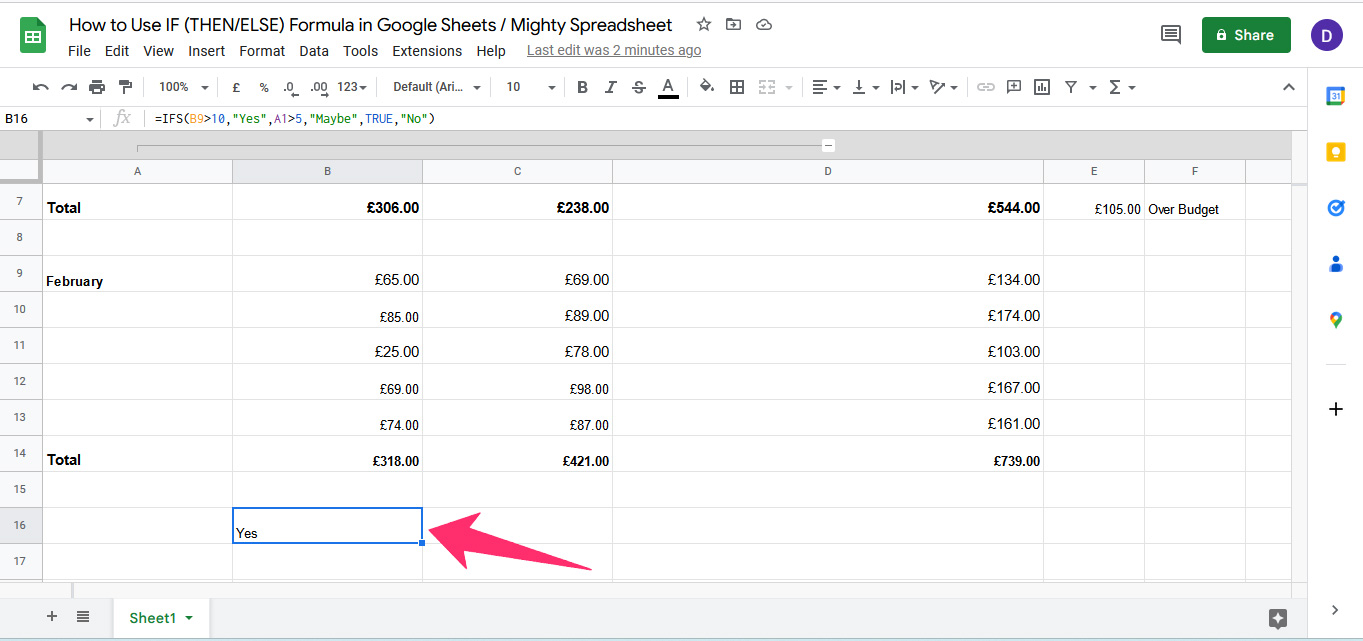
Step 2: Type =IFS(Cell Number>Value, "Yes," Cell Number > Value, "Maybe," TRUE, "No")
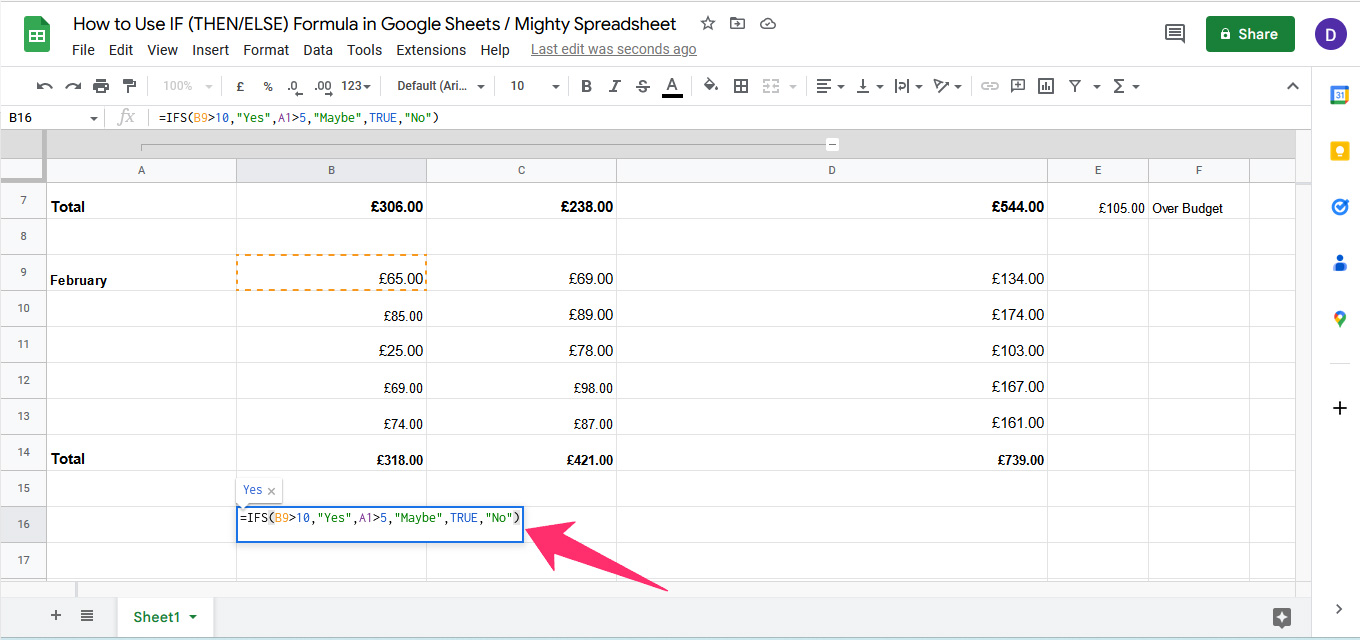
Step 3: This formula will return “Yes” if the value in the cell is greater than 10, “Maybe” if it is greater than 5 but less than or equal to 10, and “No” if it is less than or equal to 5.
Logical Expressions in Google Sheets (Combining IF formula with AND and OR)
To evaluate multiple conditions, you can combine the IF formula with logical expressions like AND and OR. This makes your formulas more flexible and allows for complex logical tests.
Using AND Function with IF
The AND function requires at least one test criteria or all test criteria to be correct to return a TRUE result. To use IF with AND, you need to type =IF(AND(AND Argument 1, AND Argument 2), value_if_true, value_if_false)
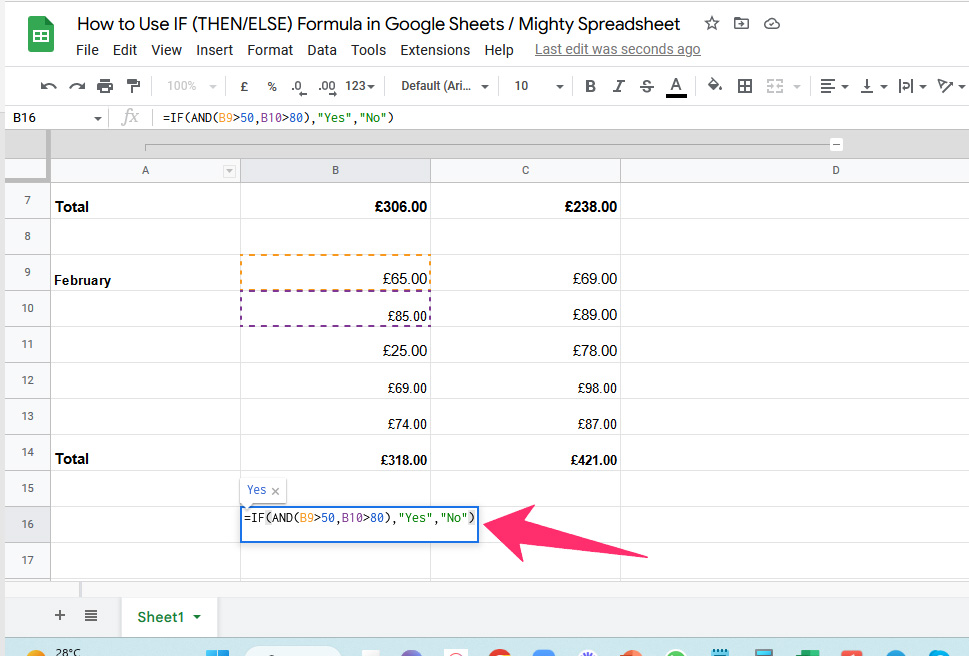
For example, let’s say you have the values 65 and 85, and you want to check if both are greater than 50 and 80 respectively.
By using the AND function with IF, you can type =IF(AND(65>50, 85>80), "Yes", "No")
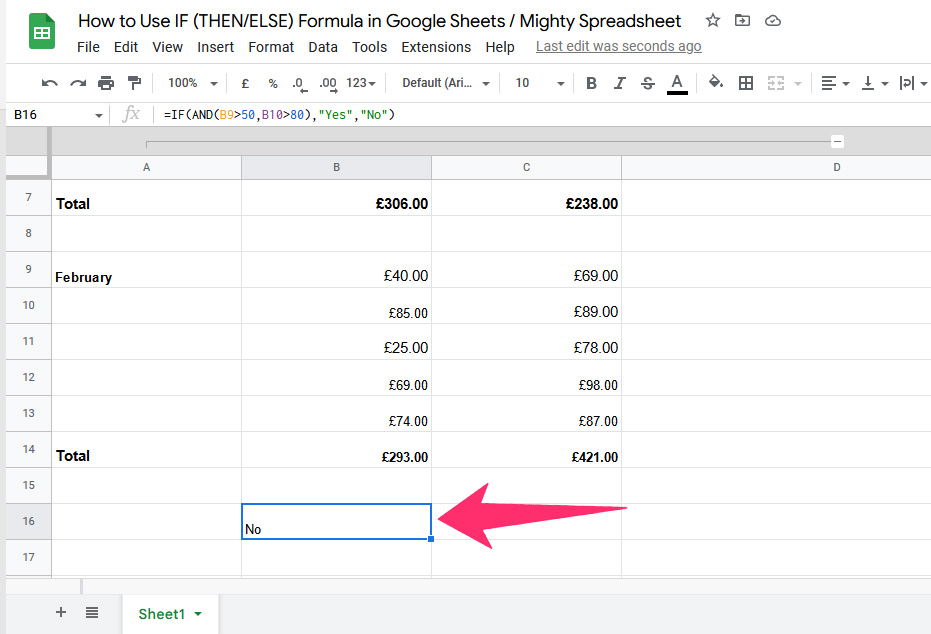
This formula returns “Yes” because both values meet their respective criteria. However, if you change even one value to be less than its corresponding criteria, the formula will return “No” because the AND function requires all arguments to be true.
Using OR Function with IF
In the OR function, if one or more values are correct, the function will return a TRUE. Below I’ve demonstrated how to use this function.
The syntax is: =IF(OR(OR Argument 1, OR Argument 2), value_if_true, value_if_false)
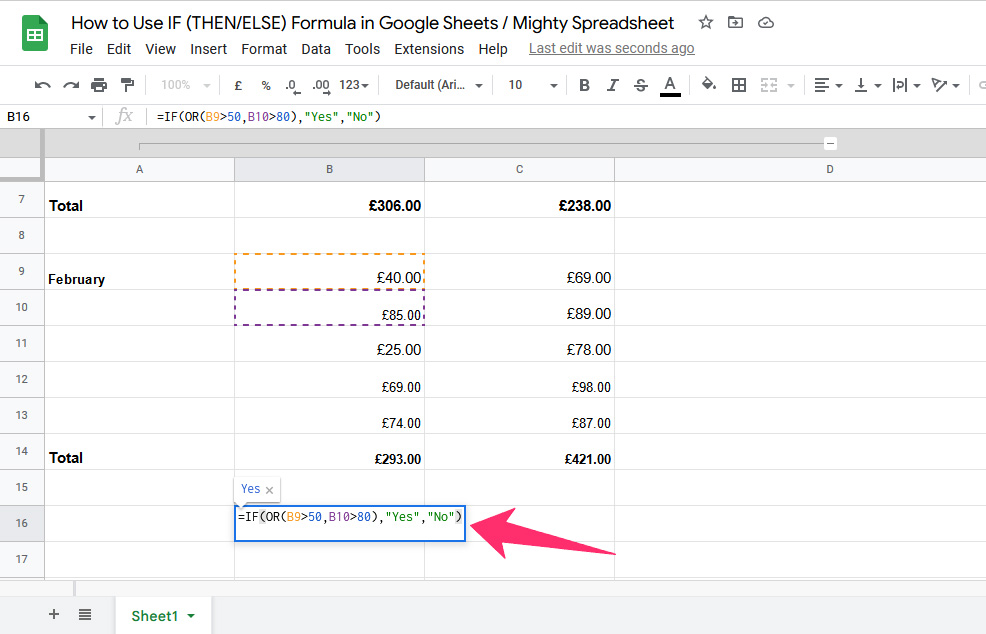
Here, the result will be “Yes“, because OR function requires only 1 value to be TRUE.
Where to Use IF with AND and IF with OR
Let me give you some examples of when to use the IF formula with AND and OR, to clear up any confusion.
IF with AND:
Say you have a list of student test scores and want to know which students scored above 80 on both the math and science tests. You can use the IF formula with AND to evaluate whether each student’s score meets both criteria and return “Yes” or “No” based on the result.
Or, if you’re tracking inventory and want to be notified when a product is running low, use the IF formula with AND to evaluate if both the quantity on hand and the reorder point have been reached, returning a message if both conditions are true.
IF with OR:
If you’re looking for products on sale, you could use the IF formula with OR to evaluate if each product’s price is less than a certain amount, returning “On sale” or “Not on sale” based on the result.
Or, if you’re tracking employee attendance and want to award bonuses to employees with perfect attendance or only one missed day, you could use the IF formula with OR to evaluate if each employee meets either of these conditions, returning a message if the condition is true.
By using the IF formula with AND or OR, you can create more complex logical tests that help you analyze and manage your data more efficiently.
Final Thoughts
By using the IF formula, you can easily sort different values and make managing your entries easier. Whether you want to sort values from two rows or multiple columns, you can use the IF-THEN function to do it within a few clicks.
Found this post knowledgeable? Stay tuned with Mighty Spreadsheet for more informative posts on Google Sheets.