Protecting cells and ranges in Google Sheets is a great way to keep your data organized and properly formatted.
This ensures that only those with access can make changes while preventing accidental editing of essential data. It also helps maintain consistency across all sheets in a spreadsheet, so everyone is working off the same information.
That’s precisely why this tutorial is a detailed guide on how to lock cells, columns, ranges, and even entire worksheets in Google Sheets so you can also implement this feature in your workflow.
I find this feature helpful, especially when sharing access to one file with a larger group of people (more than 6)
- How to Lock a Cell in Google Sheets
- How to Lock an Entire Spreadsheet in Google Sheets
- Who can lock a cell, range, or entire sheet?
- How to Unlock Cells in Google Sheets
- How to Lock Cells in Google Sheets Mobile App (iPhone, iPad, Android)
- How do you protect google sheets with a password?
- Some Questions You May Still Have
- My Final thoughts
How to Lock a Cell in Google Sheets
To learn how to lock specific cells from editing, follow these steps:
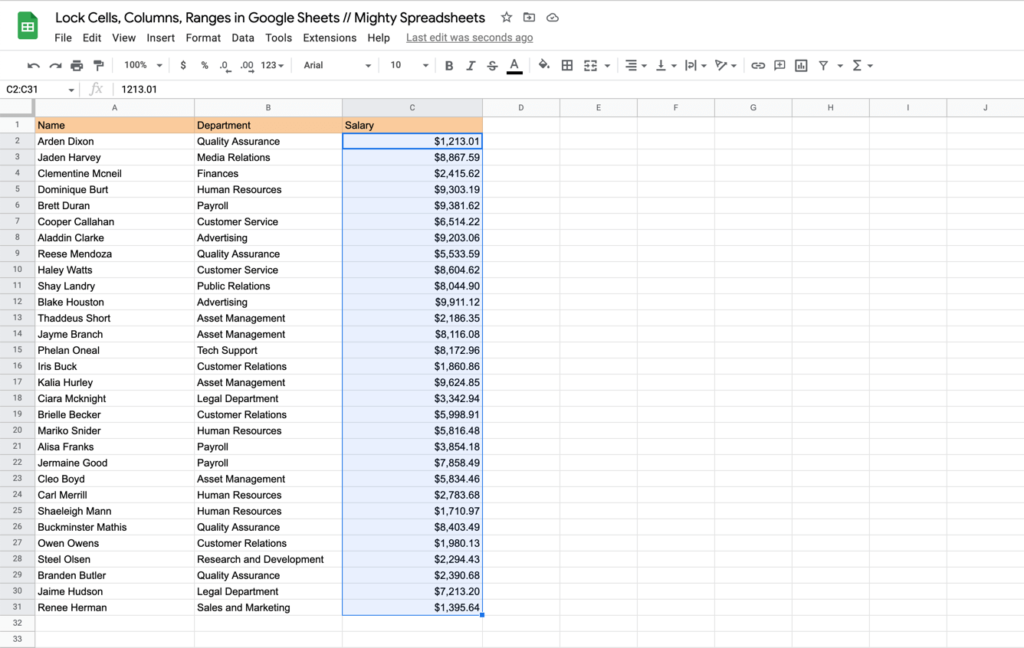
Step 1: To lock cells from editing in Google Sheets, open your spreadsheet and select the cells or range you want to protect.
Step 2: Next, click the “Data” dropdown menu at the top of your screen and select “Protect sheets and ranges.”
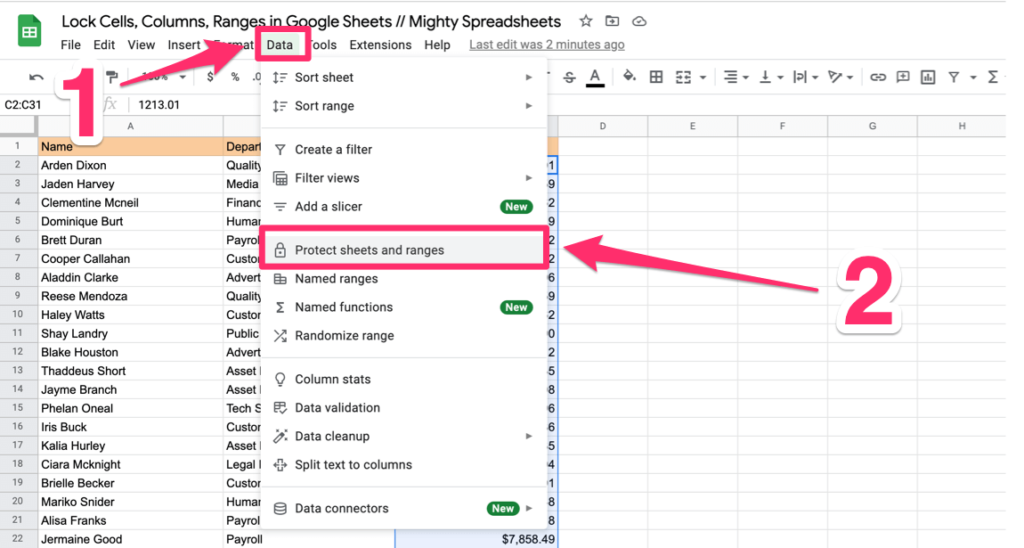
Step 3: You will then be prompted with a dialog box where you can add the range of cells or columns you want to protect.
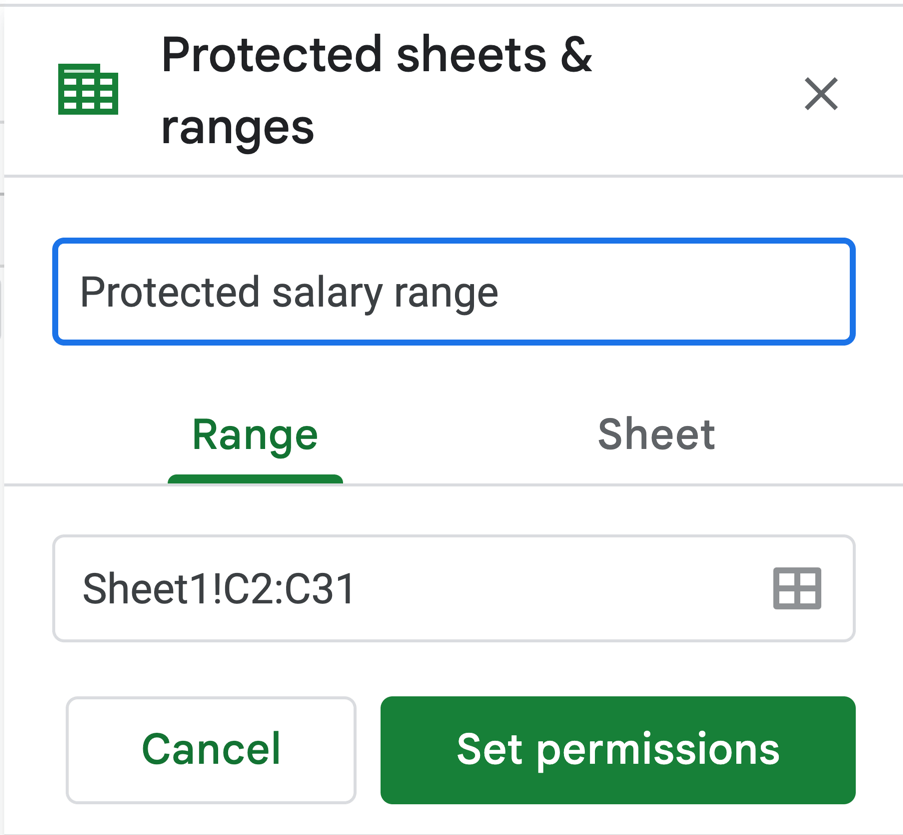
Step 4: Once you’ve added the range, you can specify which users have permission to edit (I’ll describe it more deeply in the next section)
Step 5: When you’re finished setting up your cell protection, click “Done,” and your cells will be locked against unauthorized changes.
If someone without proper access tries to edit those cells, they will see this message:
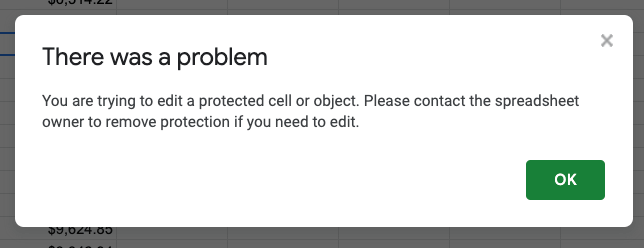
Keep in mind that when a cell is locked, not only does it lock formatting, but you also can’t alter the functions/formulas that are used inside.
Also read: How to name a range in Google Sheets without protecting it?
Lock Cells but Give Permission to Certain People (Conditional Locking)
In addition to locking cells, you can also set up conditional protection rules in Google Sheets. This means that certain users can still have editorial access to the cells.
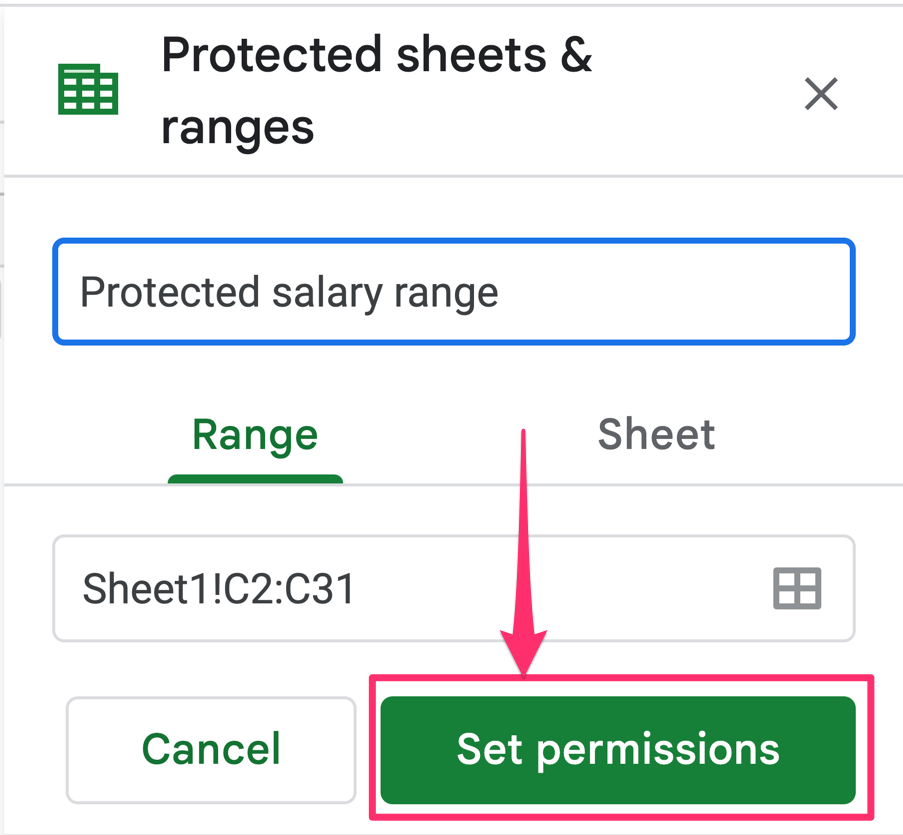
You can do it from the “Protected sheets & ranges” dialog box level. Here’s how:
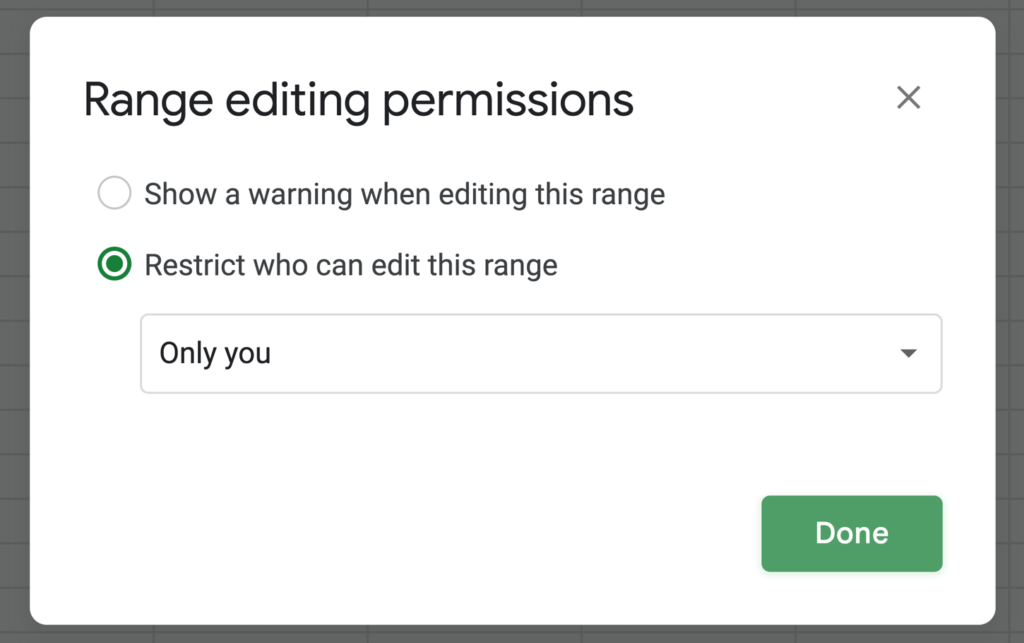
Step 1: Click on the “Set permissions” button,
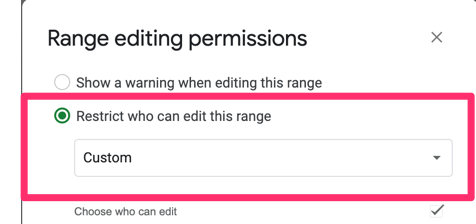
Step 2: In the popup that will appear Select “Restrict who can edit this range” and set its value to “Custom”
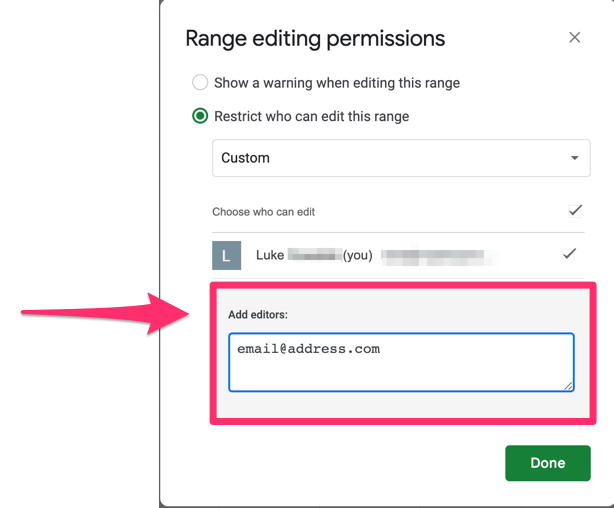
Step 3: Provide all editor’s email addresses (separated by commas)
Done!
Now only those users will be allowed to edit the specified cells.
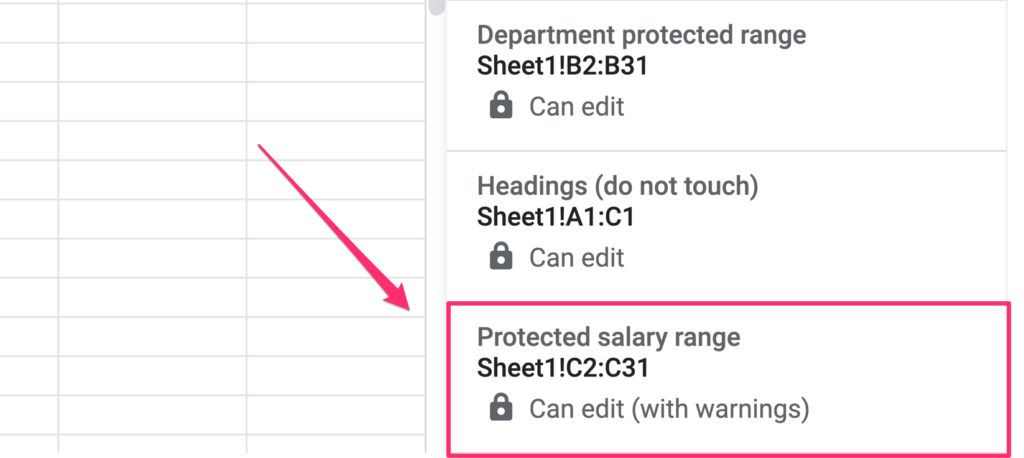
Keep Cell Editable But Warn Before Editing
There’s one other option that we haven’t gone through.
You might have noticed it when you were following steps from the previous section but if you haven’t then let’s have a deeper look now.
If you click the “Set permissions” button, you can also see a “show a warning when editing this range” option.
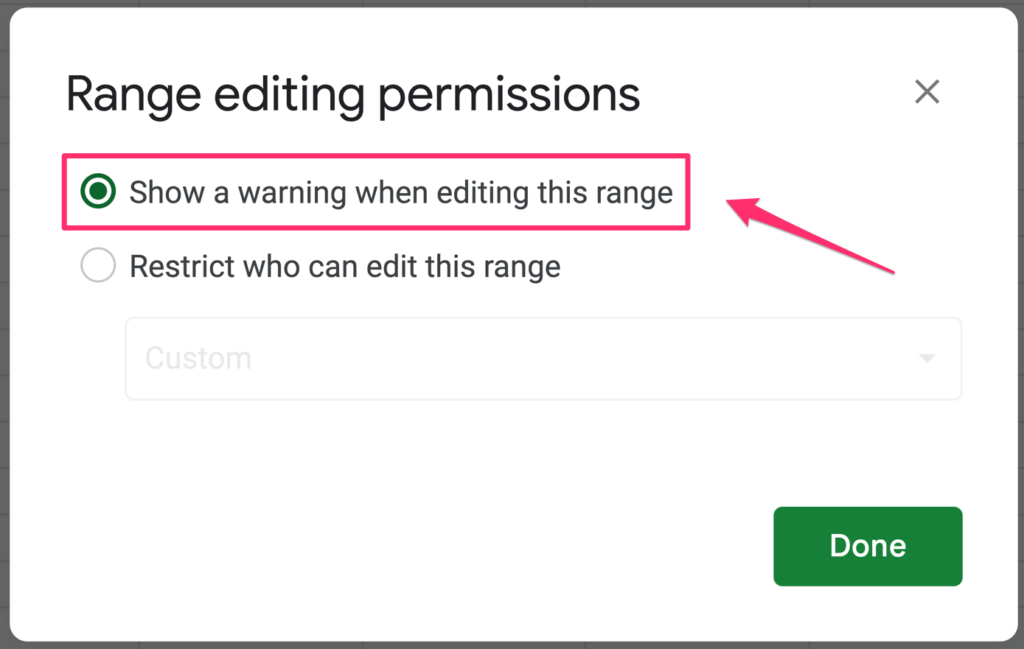
If you click on it, it will keep the cell editable but also show a popup containing the “You’re trying to edit part of this sheet that shouldn’t be changed accidentally. Edit anyway?” notification.

In my opinion, this feature is excellent when you want to avoid accidental content changes to your cells, but you allow people to make conscious decisions.
How to Lock an Entire Spreadsheet in Google Sheets
You can lock cells and ranges, but can you lock the entire sheet from editing? Sure you can!
You can also give access to certain people by providing their email addresses or keep the sheet editable and only show an advanced warning when you want to avoid accidental changes.
And the process is very similar to what we did previously. Here’s what you need to do:
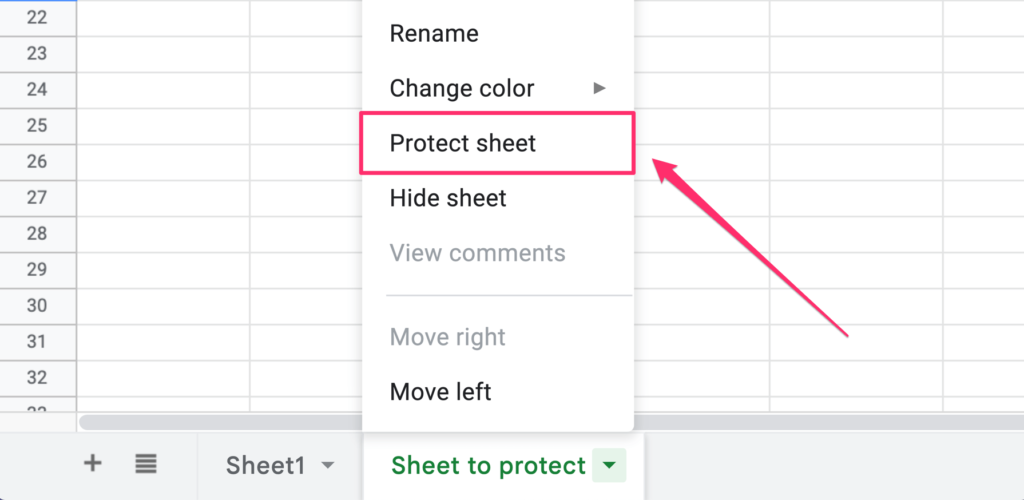
Step 1: Click on the green arrow on the right-hand side of the sheet that you want to protect
Step 2: From the contextual menu that will appear, select the “Protect sheet” option
Step 3: “Protected Sheets and ranges” dialog box will appear
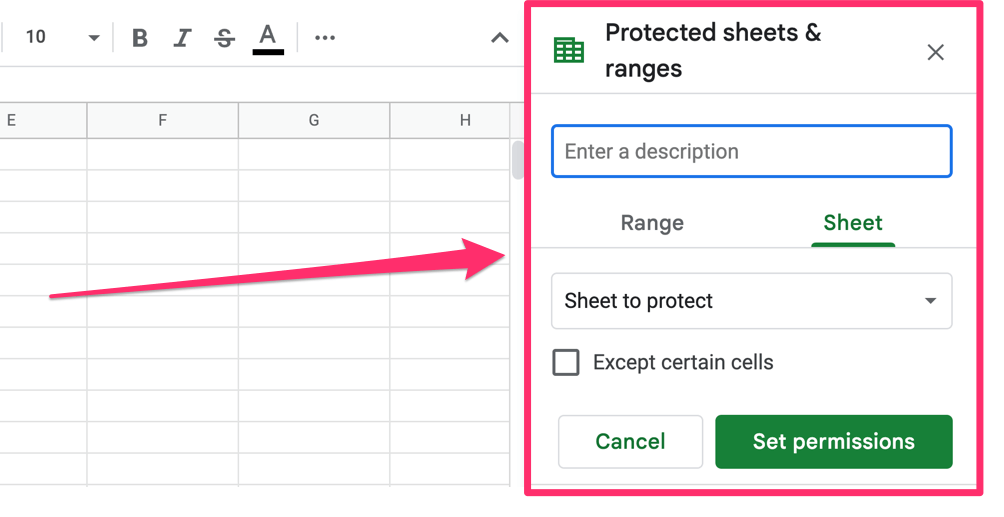
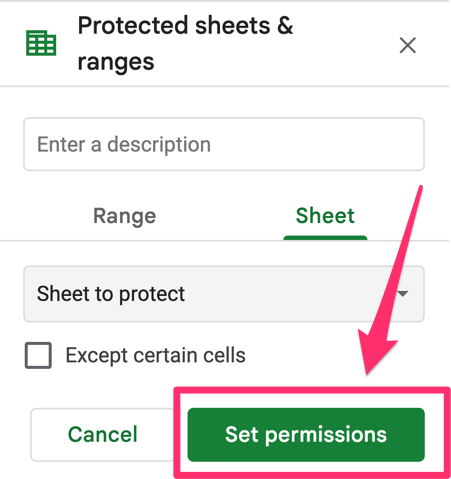
Step 4: Click on the “Set permissions” button
Step 5: From the “range editing permissions” popup, select “Restrict who can edit this range” and set its value to “Custom”
Step 6: Provide a list of email addresses to give other users access to the spreadsheet
When a sheet is locked, you will see a green padlock next to its name.
How To Lock All Cells Except a Few?
If you want to lock the entire sheet but leave a few cells or a range of cells editable, you can do that too. Remember to tick the “except certain cells” in the “protected sheets and ranges” dialog box.
After you tick the checkbox, you will be asked to provide one or more ranges that should remain unprotected.
After completing this step, you can click on the “Done” button.
Who can lock a cell, range, or entire sheet?
| Role | Capabilities |
| Owner | Decide who can change ranges and update sheets |
| Editor | You can add people that edit ranges and sheets but can’t revoke any permissions. |
| Commenter | I can only make comments |
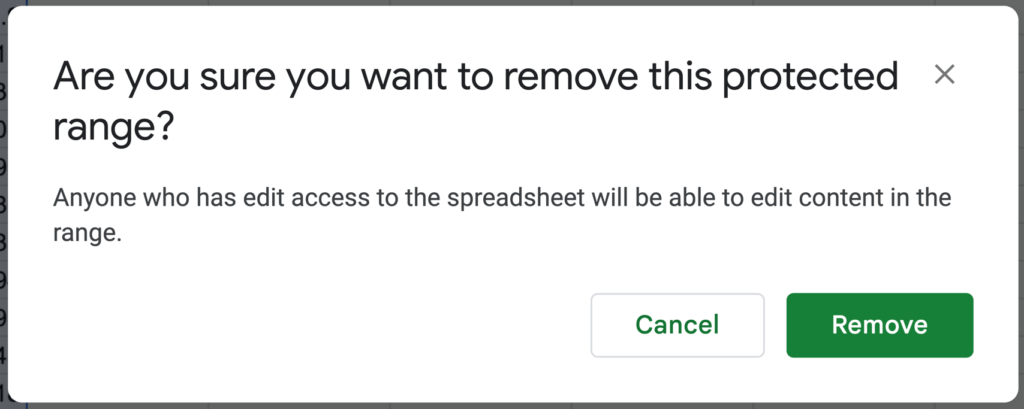
How to Unlock Cells in Google Sheets
Unlocking the cells in Google Sheets is relatively easy, and you can do it in 3 simple steps:
Step 1: From the Options Menu, select Data > Protect sheets and ranges
Step 2: Select the protected range you’d like to delete and click on it
Step 3: Find the trash icon next to the description field and click on it
Step 4: Confirm your decision by clicking the “Remove” button on the pop that appeared
How to Lock Cells in Google Sheets Mobile App (iPhone, iPad, Android)
Unfortunately, you need to use the desktop version of Google Sheets to protect cells or ranges. You can, however, hide the sheet in Google Sheets (which is not the same as it only hides the sheet from view)
How do you protect google sheets with a password?
That’s a tricky question, as there’s no native way to protect your sheet with a password.
And, if you think about it, it’s not even needed.
When you create a new google sheet, you can only access and edit it. You decide who you give access to and how much access others can have.
That means if you want to protect your Google Sheets from outsiders, you don’t need a password – don’t share it! 🙂
However, technically you can set up a password for your sheets with a script in App Scripts. This video tutorial will be a great guide if you want to protect your sheet with a password:
Some Questions You May Still Have
Can You Lock a Single Cell in Google Sheets?
Yes, you can lock a single cell in Google Sheets. Select the cell you want to lock and click on the “Protect Sheets and Ranges” button from the Data menu.
What Does Protect Sheet Do In Google Sheets?
“Protecting Sheets and Ranges” in Google Sheets is a feature that allows you to lock a range of cells or an entire sheet from editing, so someone viewing the sheet cannot make changes without your permission.
You can also provide access to certain people by allowing their email addresses or keep the sheet editable and only show an advanced warning when you want to avoid accidental changes.
How to Lock Formulas In Google Sheets?
Sadly, it’s impossible to lock formulas for editing and only enable text/formatting changes. You must protect the entire cell instead.
My Final thoughts
Protecting Sheets and Ranges in Google Sheets is an excellent feature for those who want to lock specific ranges or an entire sheet and make them uneditable. This will ensure that someone viewing the sheet cannot make any changes without the owner’s permission.
I hope this article has helped you understand how to lock cells in Google Sheets and will help your data stay clean 🙂