Sometimes it’s important to delete rows from your Google Sheets to make the data look organized and to make things fuss-free. While deleting rows might seem like a common task, it can be confusing for some users.
For whatever reason, you want to delete those rows; I’ll tell you some easy ways to do it. Keep reading to delete rows in Google Sheets on your desktop and mobile app.
How to Delete a Single Row in Google Sheets
Here are some easy methods you can use to delete a single row in Google Sheets.
- How to Delete a Single Row in Google Sheets
- How to Delete Multiple Rows in Google Sheets
- How to Delete Empty Rows in Google Sheets
- How to Delete All Rows in Google Sheets
- How to Delete Rows Containing a Value in Google Sheets
- How to Delete Filter Rows in Google Sheets
- How to Delete Rows in Google Sheets Mobile App (iPhone, Ipad, Android)
- Some Questions You May Have
- Final Thoughts
Delete Single Row Using the Options Menu
Step 1: Open the Google Sheet you want to delete the row from.
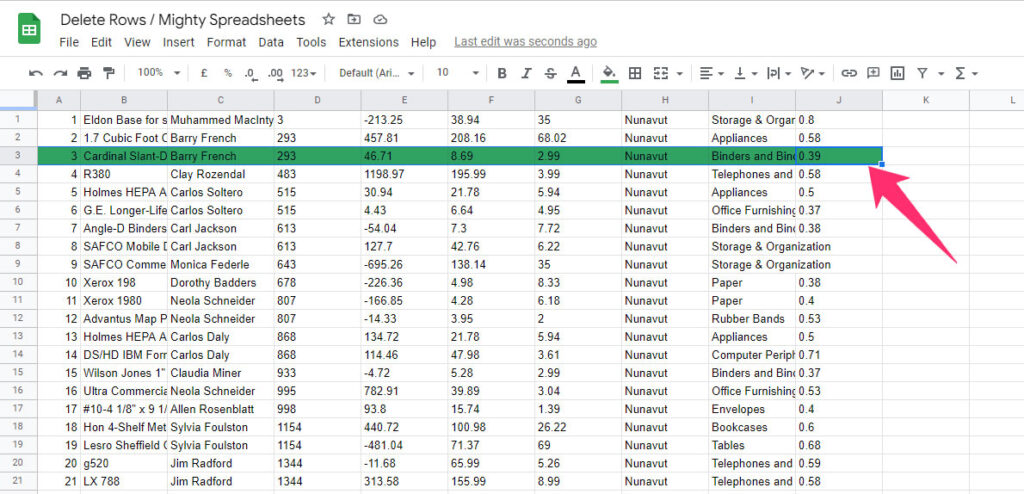
Step 2: Select the row that you want to delete.
Step 3: Select Edit from the top menu, and choose Delete.
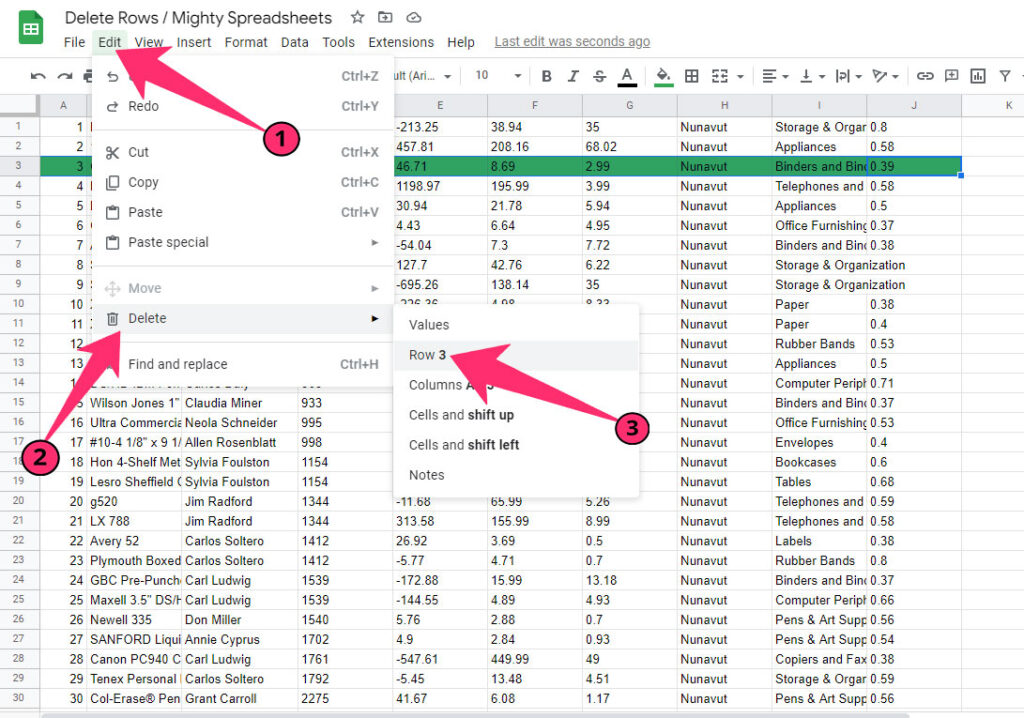
Step 4: The selected row will be deleted automatically. You can press Ctrl+Z if you accidentally delete a wrong row to reverse your action.
Delete a Single Row Using Right Click Button
Step 1: Select the row you want to delete.
Step 2: Tap on the right and click on your mouse or touchpad.
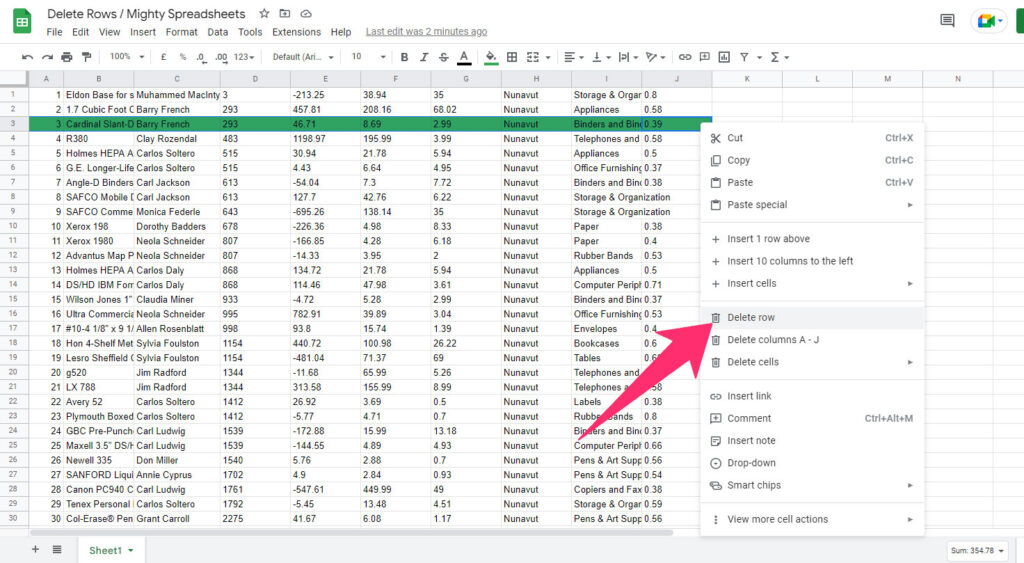
Step 3: Select Delete and the row will be deleted.
Delete a Row in Google Sheet Using Shortcut
Select the row you want to delete, and press:
- Alt + E if you are on Windows
- CTRL + OPTION + E if you are on Mac.
then just press “D” twice (first time to select the “Delete” menu item, second time to pick a “Delete row” from the sub-menu)
As you can notice on the gif above, the keyboard shortcut will open the menu items at the same time
How to Delete Multiple Rows in Google Sheets
Step 1: Open the Google Sheet you want to delete the rows from.
Step 2: Select all rows that you want to delete.
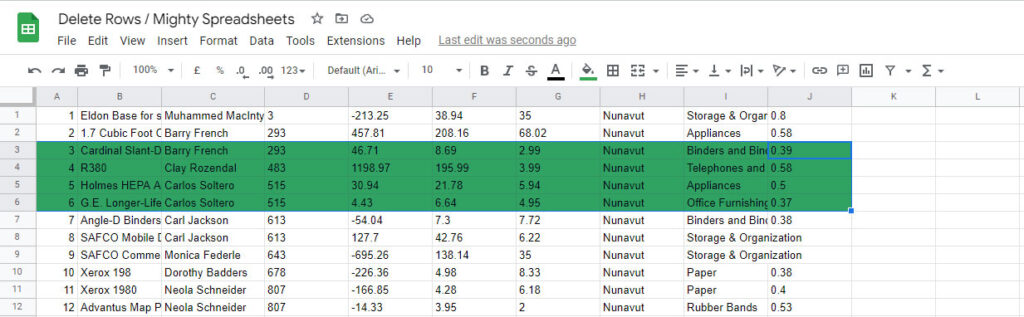
Step 3: Tap on right-click on your mouse or trackpad and select Delete.
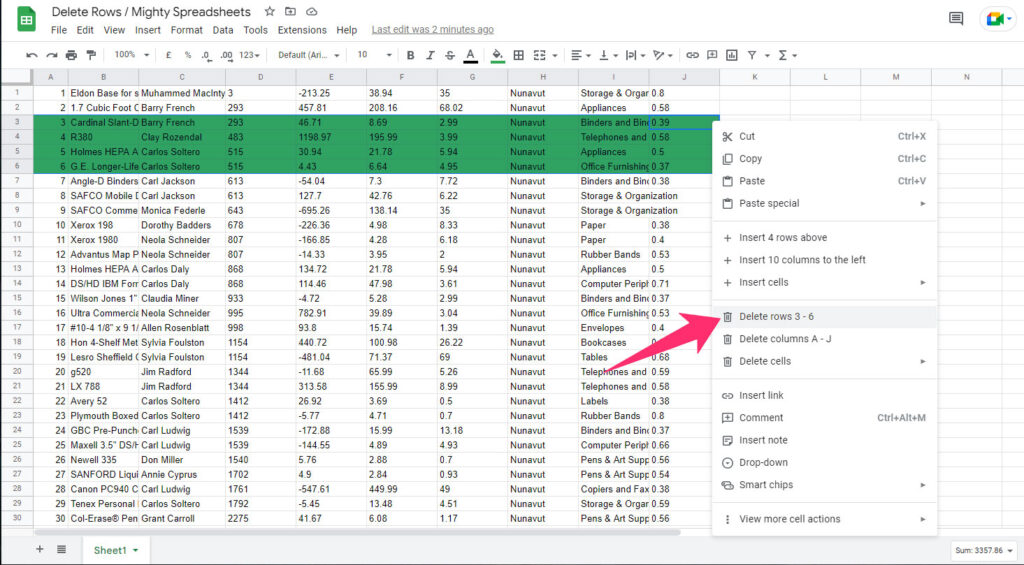
Step 4: The rows will get deleted.
How to Delete Empty Rows in Google Sheets
There are two ways to remove empty rows from your Google Sheets.
Remove Empty Rows Manually
If there are only a few rows, you can remove them manually.
Step 1: Select the rows that you want to delete. Either you can select single rows or multiple rows.
Step 2: Right-click on your mouse or trackpad and select Delete.
Step 3: The empty rows will get deleted.
Remove Empty Rows Using Addons
Step 1: You need to download a row remover tool like Remove Blank Rows.
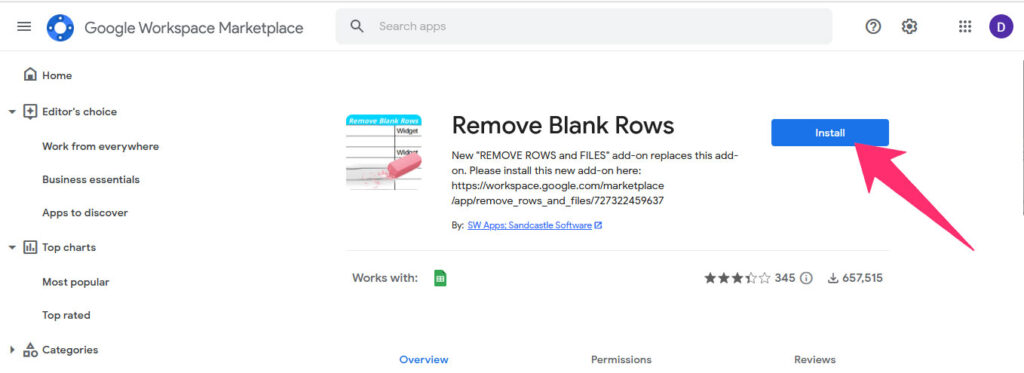
Step 2: After installing the addon, you’ll see it on the top of the toolbar in Google Sheets.
Step 3: Select the toolbar icon, and erase all empty rows that you want.
You can press CTRL+Z to undo your action.
How to Delete All Rows in Google Sheets
You can easily delete all rows from your Google Sheets with just one action.
Step 1: Press Ctrl + A to select all the rows in the Sheet.
Step 2: Right-click on your mouse or click on Edit from the Menu Bar.
Step 3: Select Delete, and you can delete all rows from your Google Sheet.
How to Delete Rows Containing a Value in Google Sheets
There’s no way to delete rows containing a specific value from Google Sheets directly from the Options Menu. You can however use App Scripts to write a code that will do it for you.
Just for sake of clarity, this is the data we will be working on:
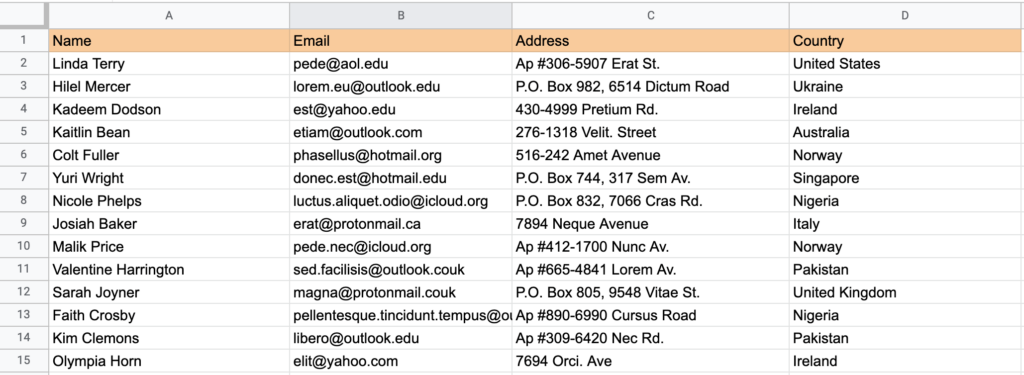
It contains 4 columns:
- Name
- Email address
- Street address
- Country
Here’s what you need to do:
Step 1: From the Options Menu select “Extensions” > “Apps Script”
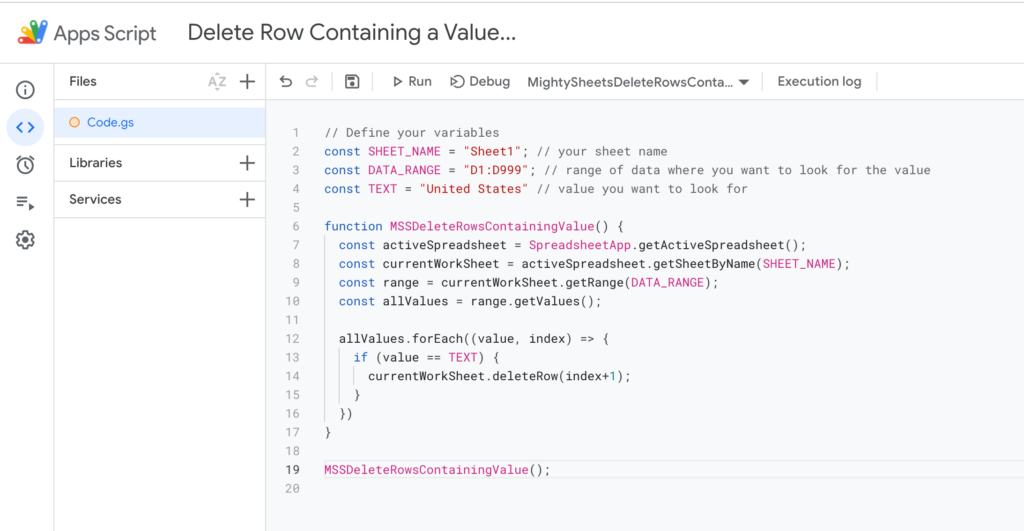
Step 2: In the Apps Script editor add this function code:
// Define your variables
const SHEET_NAME = "Sheet1"; // your sheet name
const DATA_RANGE = "D1:D999"; // range of data where you want to look for the value (in this case it is the "Country" column)
const TEXT = "United States" // value you want to look for

function MSSDeleteRowsContainingValue() {
  const activeSpreadsheet = SpreadsheetApp.getActiveSpreadsheet();
  const currentWorkSheet = activeSpreadsheet.getSheetByName(SHEET_NAME);
  const range = currentWorkSheet.getRange(DATA_RANGE);
  const allValues = range.getValues();

  allValues.forEach((value, index) => {
    if (value == TEXT) {
      currentWorkSheet.deleteRow(index+1);
    }
  })
}

MSSDeleteRowsContainingValue();
It should look like this:
If you are not familiar with JavaScript this is the function breakdown for you:
- You declare all variables that will be used in the function
SHEET_NAMEis your current worksheet name,DATA_RANGEis the range where you will be looking for a valueTEXTis the string that you will be looking for in your cells
- The function uses your declared data to get all values from the working spreadsheet and stores them in an array called
allValues - Finally, it loops through each value using the forEach method. If the cell value contains the TEXT variable string (‘United States’) it deleted the whole row containing that value
In short – this function looks for the string “United States” in column D and if it finds it, it deletes the entire row.
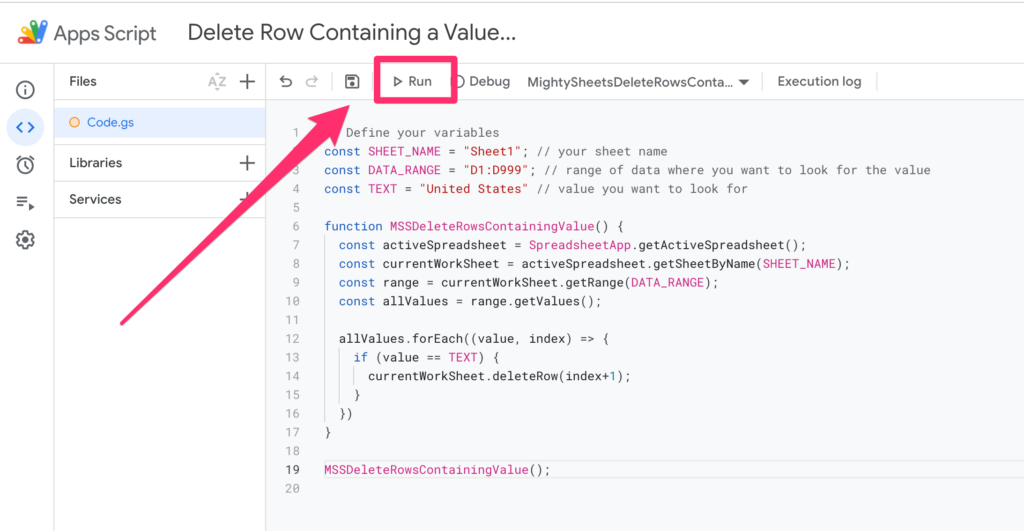
Step 3: Execute the function by clicking on the “Run” button
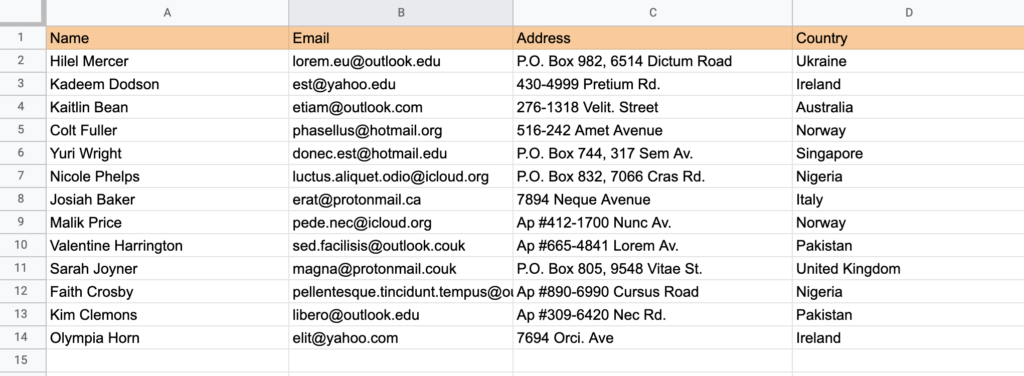
That’s all it takes. And here’s the final example without rows that were containing “United States” as a country:
PS. You can also copy this spreadsheet if you’d like to see it in action. All App Scripts and functionality will be copied too
How to Delete Filter Rows in Google Sheets
This step is completely optional but if you want to follow this part of the article you can create a copy of this spreadsheet.
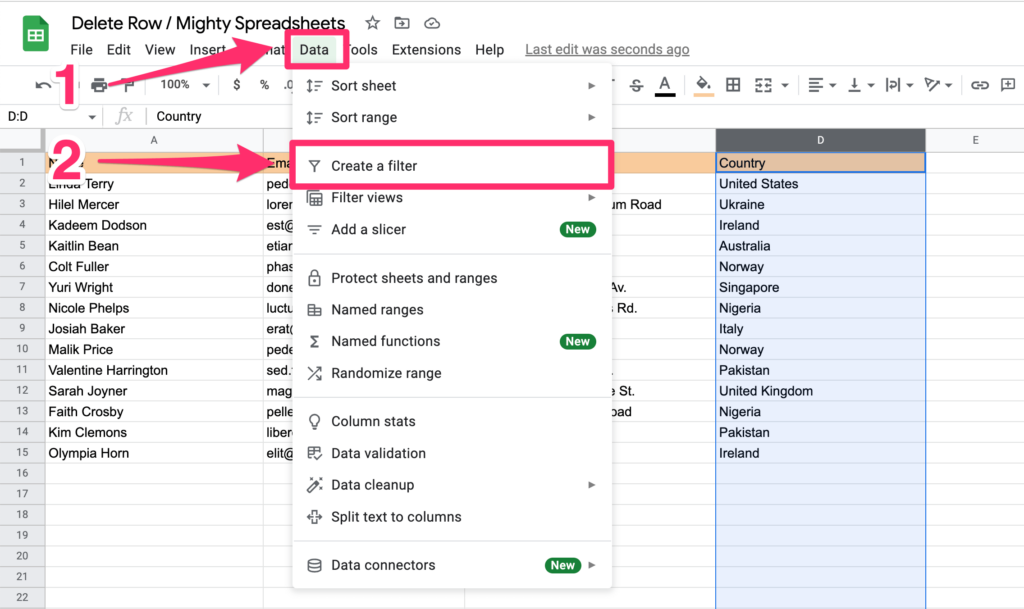
Step 1: Filter your data by creating a new filter
- Select a whole column just by clicking on it.
- Then go to Data > Create filter
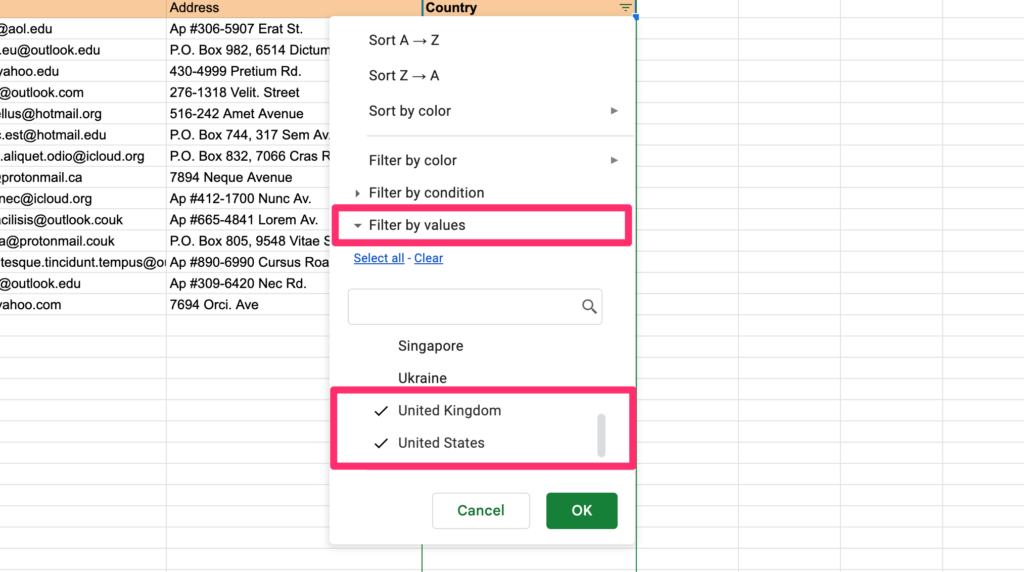
Step 2: Click on the small filter icon that appears next to the column heading
Step 3: Create a new filter. Here we will filter by values and show only entries containing “United Kingdom” and “United States” as a country
Step 4: Select all filtered rows that you want to delete.

Step 5: Right-click anywhere on the screen or click on Edit from the menu bar.
Step 6: Select “Delete” and then “Selected rows”

Step 7: Let’s turn the filter off.
- Select the “D” column once again
- In the Options Menu go to “Data” > “Remove filter”

This is how the data should look right now:

Did you know that filtering items is one of the methods of hiding rows in Google Sheets? In this article, you can check other methods to hide and unhide rows in Google Sheets
How to Delete Rows in Google Sheets Mobile App (iPhone, Ipad, Android)
Step 1: Open Google Sheets on your smartphone or tablet. Select the row (or rows) that you want to delete.
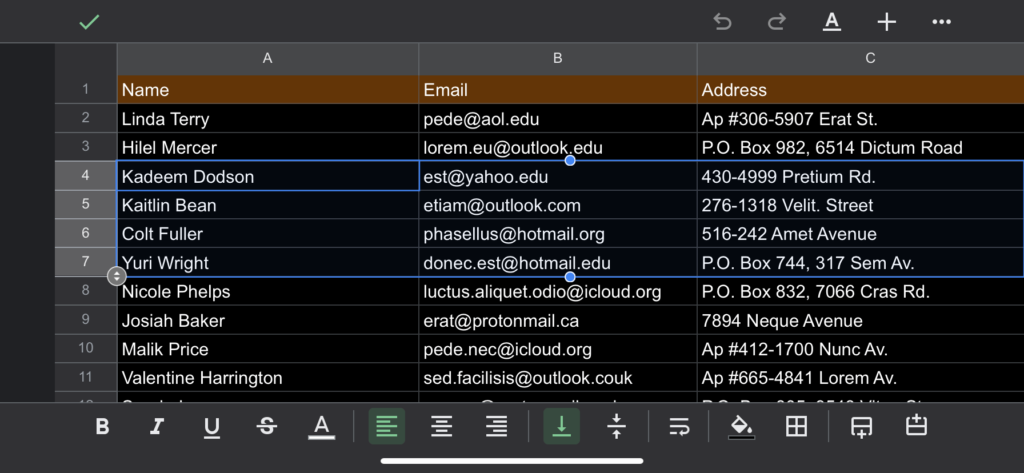
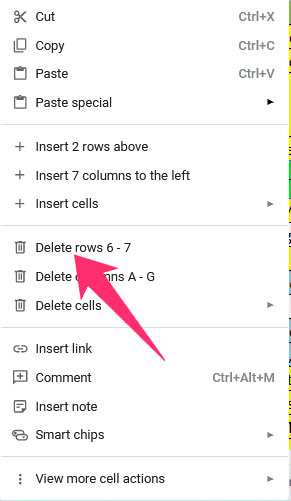
Step 2: Double Click on the row header (row number)
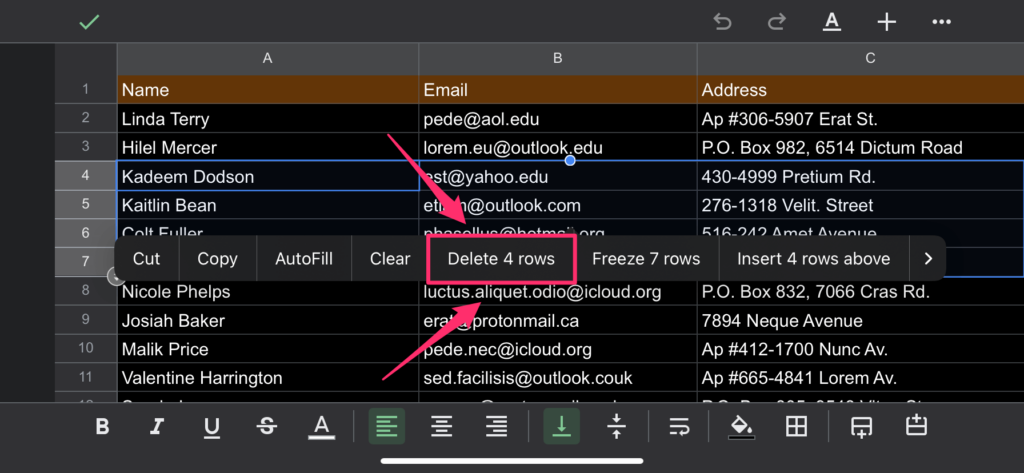
Step 3: From the contextual menu that will appear select Delete [number] rows to remove it from the Google Sheets.
Turning dark mode in a mobile App is quite easy, but did you know that you can also have it on a desktop? Read this article if you want to learn how to turn on Google Sheets dark mode on a PC
Some Questions You May Have
Why can’t I delete a row in Google Sheets?
It could be due to a poor or no internet connection. Google Sheets require you to have an active internet connection to make any changes.
How do I delete rows without dragging?
To delete rows without dragging you have to select the row header of the particular row you want to delete. Right-click on it, and choose Delete from the pop-up.
How do you delete rows quickly?
The quickest way to delete rows from Google Sheets is by selecting the rows, right-clicking on the screen, and choosing Delete.
Final Thoughts
That’s everything you want to know about deleting rows in Google Sheets. I have listed multiple methods you can use on desktop and smartphone.
However, if you are still facing any issues drop your queries in the comments section, and I’ll do my best to get back to you with a solution.