This tutorial provides an in-depth guide on how to group and collapse rows and columns in Google Sheets.
The easiest way to group rows and columns in Google Sheets:
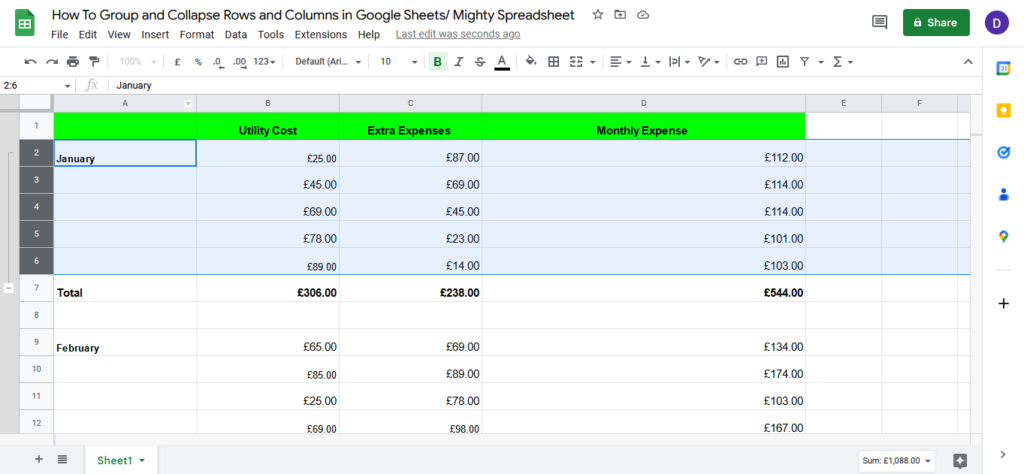
- Select the desired rows/columns.
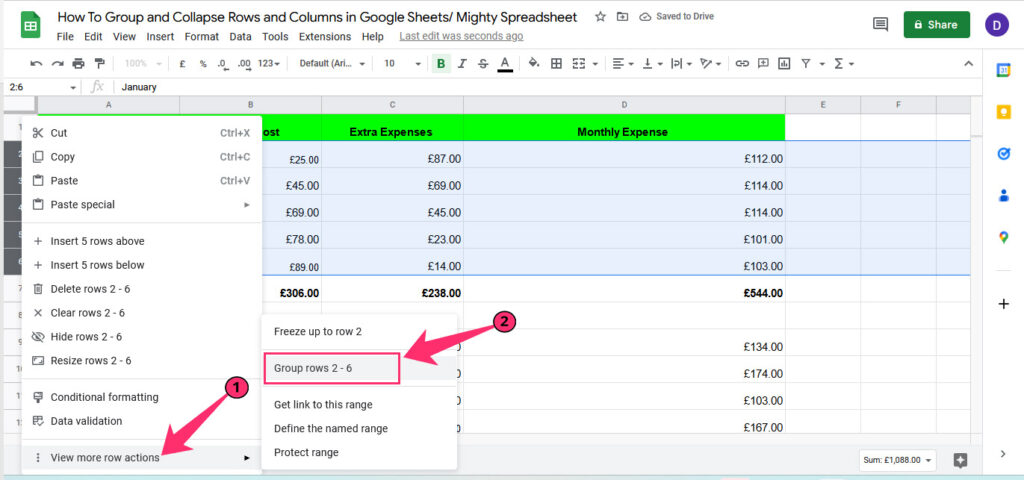
- Right-click anywhere on the screen.
- Choose “View More Actions.”
- Select “Group Rows” to group them.
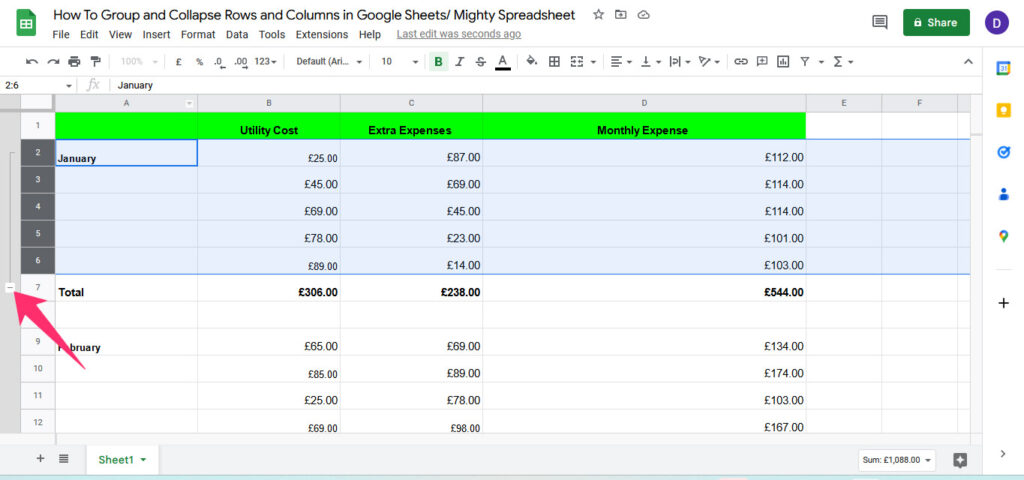
To collapse the group, click the (-) sign located on the left edge of the screen.
Now, let’s explore other ways of grouping and collapsing cells. Read on to make your large datasets easier to understand and work with.
How To Group Rows in Google Sheets
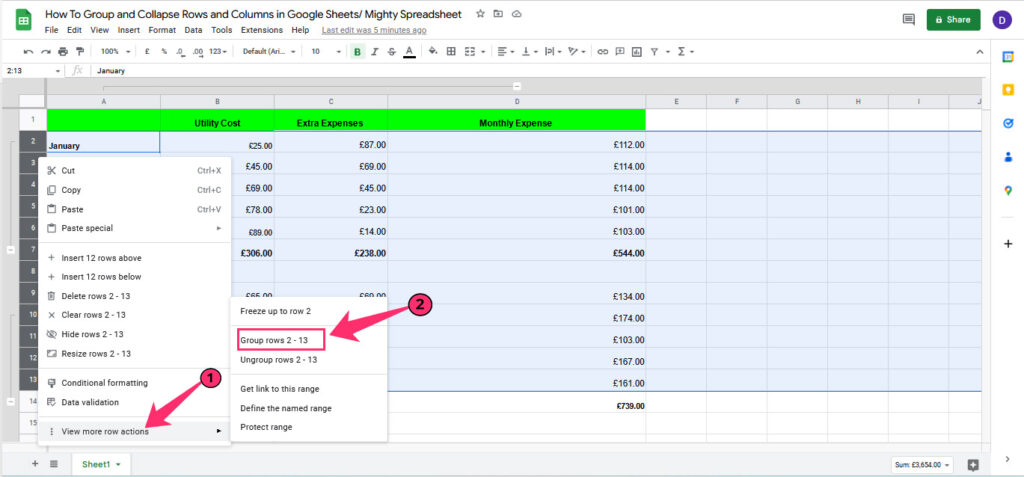
Step 1: Open your Google Spreadsheet and select the rows you want to group.
Step 2: Right-click anywhere on the screen and choose “View More Row Actions” followed by “Group Rows” from the dialog box that appears.
Step 3: This will group the selected rows, and the collapse-expand button will appear on the left side of the screen.
How To Group Rows Using Keyboard Shortcut? (Mac and Windows)
For Windows:
- Select the rows you want to group.
- Press and hold Shift + Alt + Right Arrow Key.
For Mac:
- Select the rows you want to group.
- Press and hold Shift + Option + Right Arrow Key.
Note: To quickly ungroup the selected rows, press Shift + Alt + Left Arrow Key on Windows or Shift + Option + Left Arrow Key on Mac.
How to Collapse Rows in Google Sheets
Once you group rows in Google Sheets, collapsing them can help keep your sheet more organized. Here’s how:
Step 1: After grouping your rows, you’ll see a collapse rows option on the left side of your sheet.
Step 2: Click on the (-) sign to collapse the selected rows.
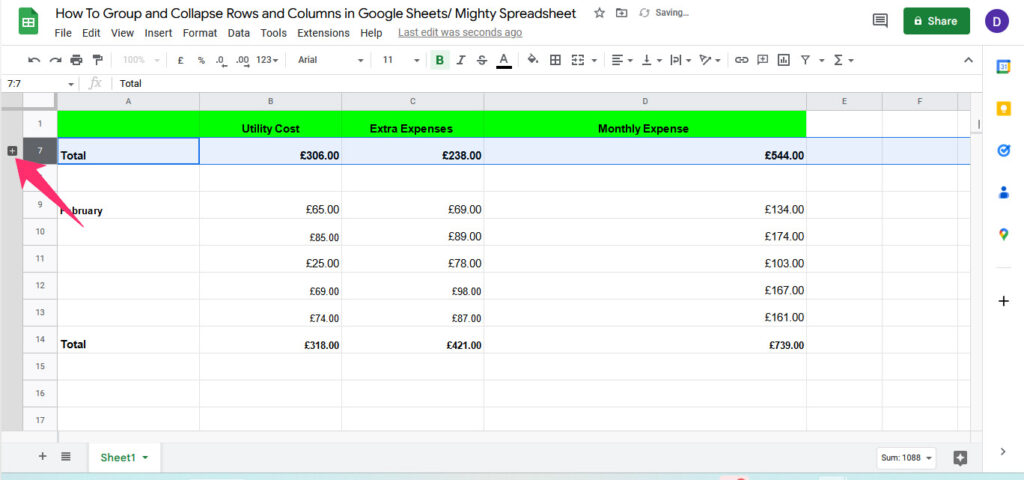
Step 3: Once collapsed, the (-) sign will change into a (+) sign.
How to Group Columns in Google Sheets
Grouping columns in Google Sheets is just as simple as grouping rows. Just follow these steps:
Step 1: Select the columns you want to group.
Step 2: Right-click anywhere on the screen and select “More Column Options.”
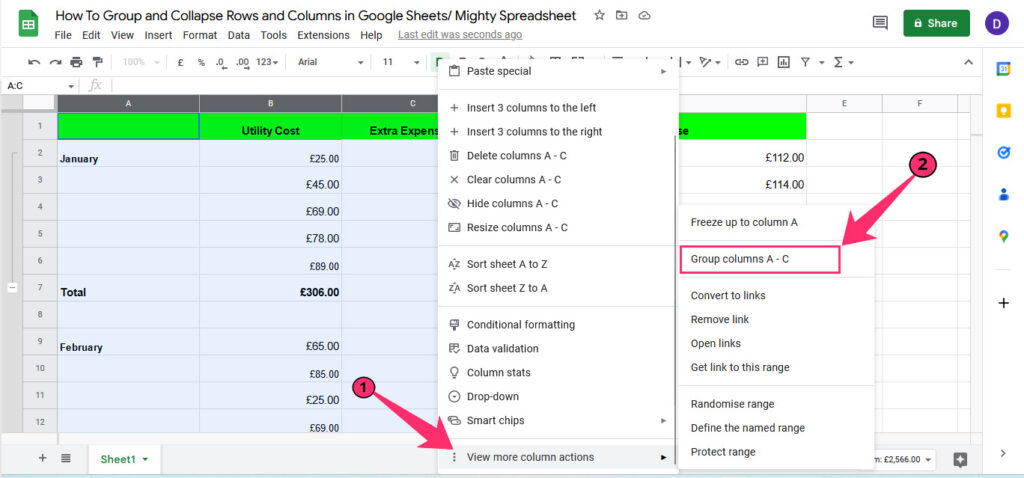
Step 4: This will create a group of the selected columns, and you can expand or collapse the group to keep your data organized.
How To Group Columns Using Keyboard Shortcut? (Mac and Windows)
The keyboard shortcut to group columns in Google Sheets is the same as grouping rows. Follow these steps:
For Windows:
- Select the columns you want to group.
- Press and hold Shift + Alt + Right Arrow Key.
For Mac:
- Select the columns you want to group.
- Press and hold Shift + Option + Right Arrow Key.
Note: To ungroup selected columns, press Shift + Alt + Left Arrow Key on Windows or Shift + Option + Left Arrow Key on Mac.
How to Collapse Columns in Google Sheets
After grouping columns in Google Sheets, you can collapse them to keep your sheet more organized. Here’s how:
Step 1: Above the grouped columns, you’ll see a straight line with a (-) sign.
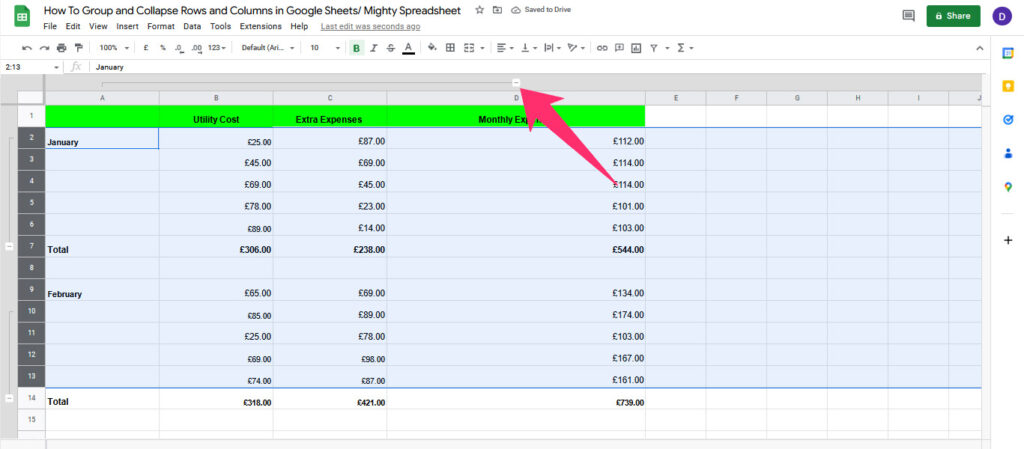
Step 2: Click on this icon, and the columns will collapse.
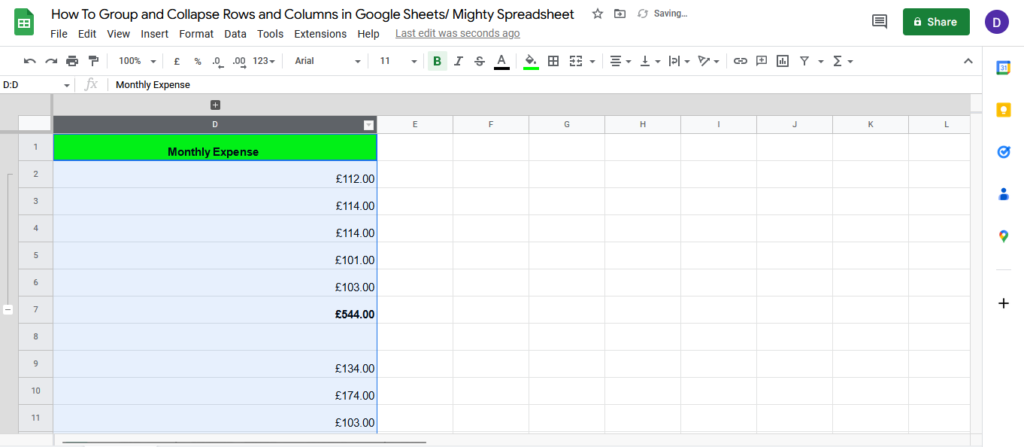
Step 3: Once collapsed, the (-) sign will change into a (+) sign. Click on it to expand the columns.
Related article: How to Delete Rows in Google Sheets
How to Create Nested Groups of Rows?
Managing multiple groups in Google Sheets can get confusing, so creating nested groups of rows can help keep your data organized. Here’s how:
Step 1: Select all the rows you want to group together.

Step 2: Right-click anywhere on the screen and select “View More Row Actions.“
Step 4: This will create a nested group of grouped rows, which can be further grouped together to keep your data well-formatted and easy to manage.
Step 5: To collapse all nested row groups at once, simply click on the nested group icon..
Some Questions You May Still Have
What is a Group of Cells Called in Google Sheets?
In Google Sheets, a group of cells is referred to as a “range.” A range is a rectangular selection of two or more cells on a sheet, which can include rows, columns, or both.
Once selected, you can perform a variety of actions on the range, such as formatting, editing, or copying data. Additionally, ranges are useful for creating formulas that reference multiple cells simultaneously.
Related article: How to Add and Use Named Ranges in Google Sheets
Can You Group Rows in Google Sheets?
Yes, you can group rows in Google Sheets. Grouping rows allows you to collapse and expand multiple rows at once, making it easier to navigate through large sets of data.
How to Group Rows by Value in Google Sheets?
To group rows by value in Google Sheets, use the “Group by” feature. Here’s how:
- Select the range of cells you want to group by value.
- From the drop-down menu, select “Create a filter.”
- A small arrow icon will appear in the header row of each column. Click on the arrow icon for the column you want to group by.
- In the drop-down menu, select “Sort sheet A-Z” or “Sort sheet Z-A” to sort the values in the column in ascending or descending order.
- Once the column is sorted, click on the arrow icon again and select “Group by [Column Name].”
- The rows will now be grouped based on the values in the selected column.
Further Reading
Here are a few useful recommendations if you are interested in extending your knowledge about grouping rows and columns in Google Sheets:
- Automatically Number Rows in Google Sheets This post is relevant for readers who want to learn additional ways to organize rows in Google Sheets, such as numbering them.
- Named Ranges in Google Sheets This article discusses named ranges, which can be useful for users who want to improve the organization and referencing of their grouped rows and columns.
- Hide and Unhide Rows and Columns This post explains how to hide and unhide rows and columns, a complementary skill for those who are grouping rows and columns to better manage their data in Google Sheets.
- Freeze Rows and Columns in Google Sheets This article teaches how to freeze rows and columns, another technique that can be used in conjunction with grouping to enhance the navigation and readability of a Google Sheet.
- Filter Data in Google Sheets Filtering data is a commonly used feature that can help further organize and view grouped rows and columns in Google Sheets.
Final Thoughts
Grouping rows and columns in Google Sheets is a useful feature that can help you manage large sets of data. By grouping rows together, you can collapse and expand sections of your data, making it easier to navigate and analyze.
Google Sheets makes it easy to group rows by value, date, or other criteria, using its intuitive interface and powerful grouping options. By following the steps outlined in this tutorial, you can start using the group rows feature in Google Sheets today and take your data analysis to the next level.